Elegant Mudroom Addition
RECENT POSTS
Heacock Builders Wins Contractor of the Year Award
We are excited to announce that we won a national Contractor of the Year (CotY) award for a detac
POPULAR POSTS


Elegant Mudroom Addition
Project Objectives
The homeowner came to the architect to design a mudroom and garage that would seamlessly tie into the existing house and fit specific needs. Some of these needs corresponded to the client’s hobbies. The clients enjoy being outside and tending to their beautiful flower gardens and planting beds. Because of this, they would many times want to come into an area where they could remove soiled clothing and clean up quickly before they entered the house. Also, they wanted a new entry to be attached to both a new garage and the existing driveway. The driveway was four feet below the existing first floor. It was requested that the entry have a sitting bench for removing shoes, as well as storage for shoes, coats, umbrellas and other similar items. They were also in need of a laundry room where they could fold, iron and sort clothes. The mudroom addition had to have a full bathroom, laundry sink, and lots of storage. The storage had to include an area to fit the owner’s ironing board. The workspace in the laundry area also needed ample natural light to minimize the need for task lighting. The new mudroom needed to be connected to the existing kitchen and an additional door was to be added off of the kitchen to an existing side patio. A covered porch was also requested outside this door for protection from the weather. Since the client also lives on a small street with a very small driveway, there is only enough space to park 2 cars. The client desired to add a garage to fit an
additional car on the property. The garage is also designed to incorporate a future lift for when the owners are no longer able to walk up the stairs. The addition also needed to respect the aesthetics of the existing house through design, details and quality. Another challenge was the changes in grade between the driveway, first floor and rear patio. Careful thought and planning was performed by the architect to maximize the needs of the client while also maintaining the setback requirements governed by zoning laws. These requirements defined the position of the one side of the building and limited the overall size.

 Planning
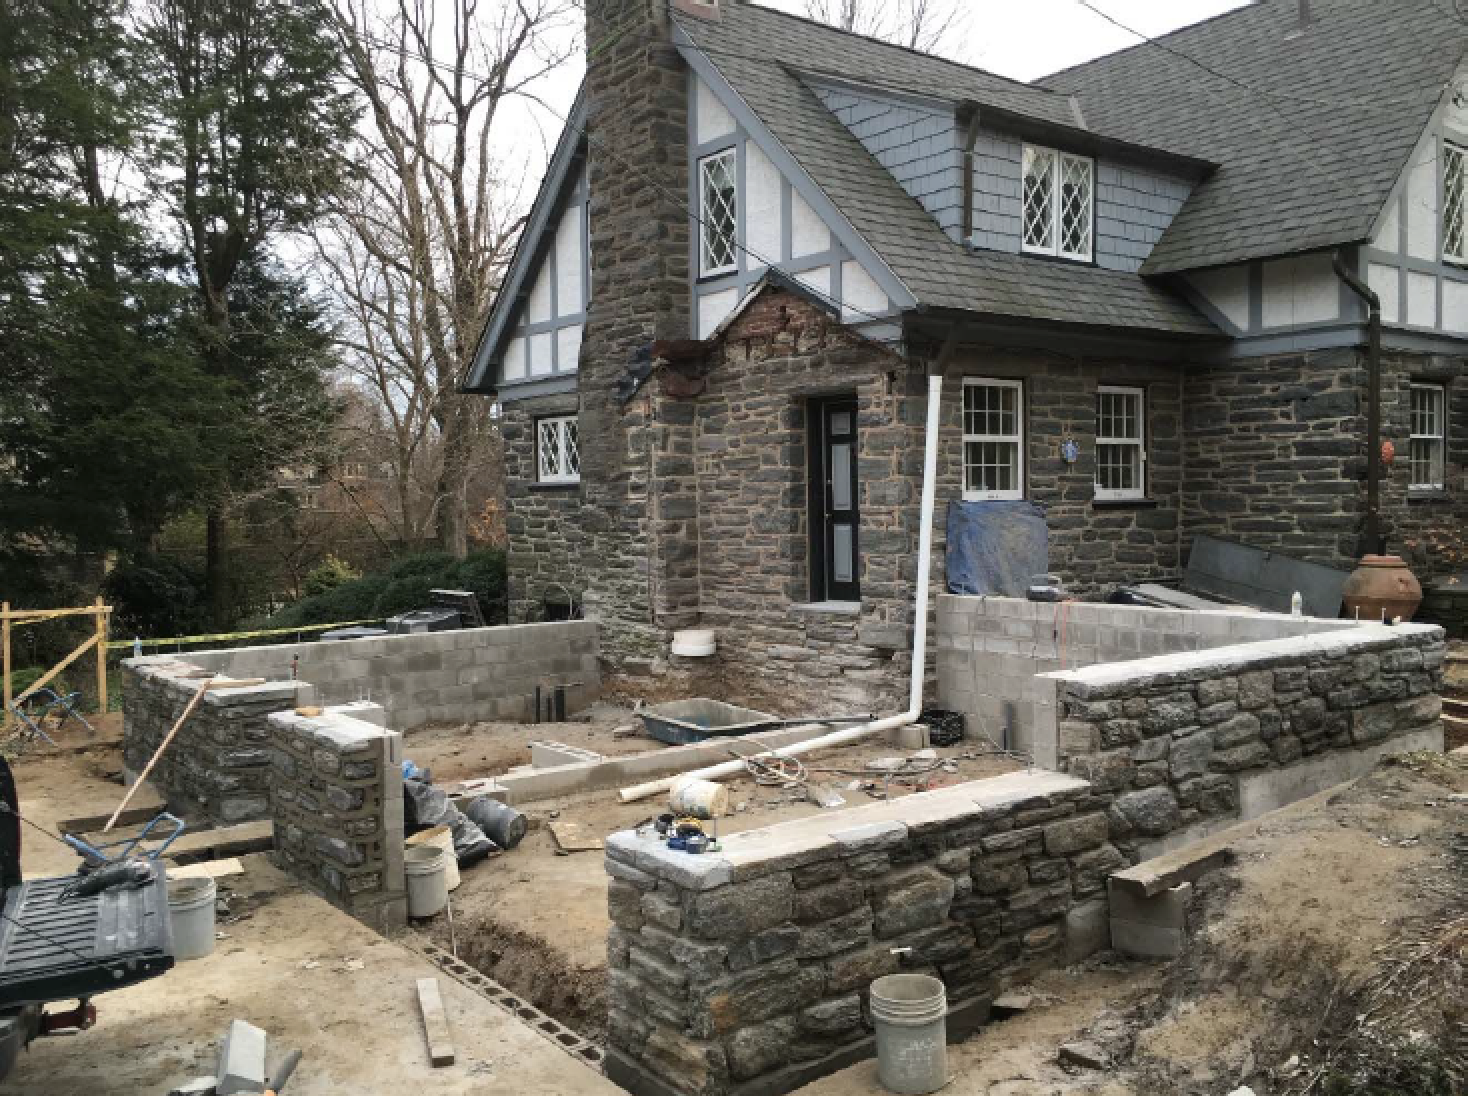
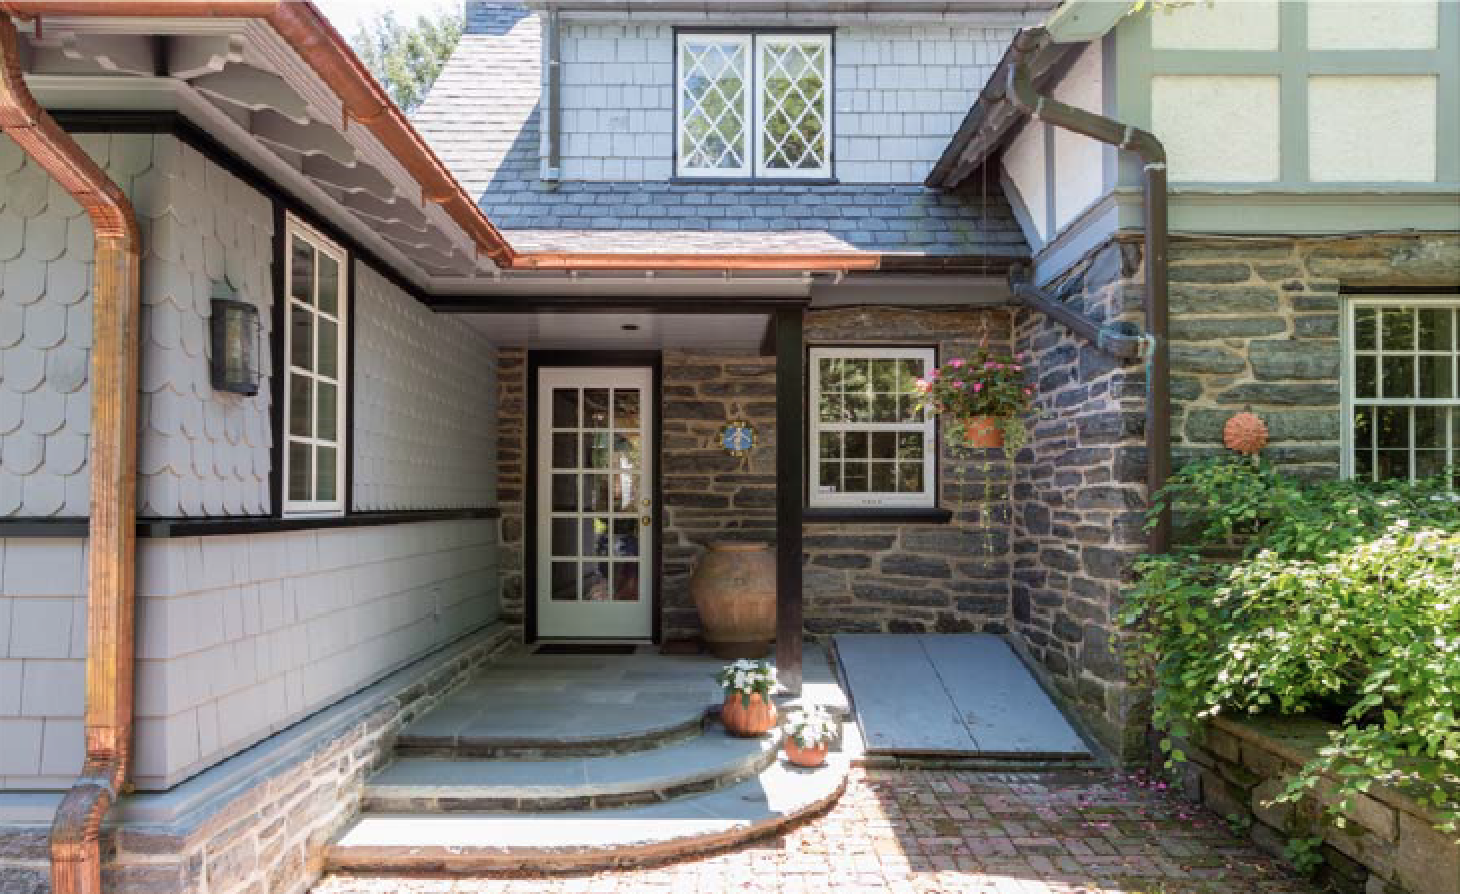
The addition may appear straight forward, but careful consideration had to be accounted for in the initial planning stages. The addition had many different elements which had to work together in order to function properly. First, the garage had to be at grade level with a door accessing the foyer. Because of the code, the foyer had to have a step up from the garage for exhaust fumes. And because of the grade, the front entry door had to be two steps above the driveway. This created some extensive layout with the masonry to allow these requirements to all work smoothly together. The new foyer is three feet below the finish floor and includes a set of flagstone steps to get to the first floor. Second, a closet is extended into the garage with adequate space required for an ADA turning radius. This closet will accommodate an entrance for a future wheelchair lift. Within the garage, a platform is also provided to house the future lift. Preparations were taken into account with the garage floor and the framing of a future door into the closet to accommodate the lift. This took some ingenuity with the layout of the concrete slab in the garage. The main garage floor had to slope towards the garage door, but the area for the future lift had to be perfectly level. Therefore, the slab is laid out in a way to maximize the main slope and minimize the corresponding access slope created by the lift area. The result was perfect and blended together seamlessly (see picture at end). Next, Two different exterior masonry wall heights were also designed to accommodate changes in elevation and grade. The front door is also recessed into the foyer with a landing projecting into the driveway. The complexity of the foundations and changes in walls set this addition apart from a traditional addition (see foundation picture above). Next, the existing flagstone steps (see before picture above) were relocated to the side of the new addition. This had to tie in with the existing driveway and existing rear patio. A set of curved flagstone steps were also laid out and built from the existing rear patio to a new door opening into the kitchen. This area is covered by a roof, which ties into the existing roof and new addition (see picture below). Finally, the vertical alignment of the windows, trim and roof had a critical role in the overall design and aesthetics of the building. These items had to be continuous throughout and left no room for errors. But by the careful preparation, the final product creates an addition which stands out as a work of art.
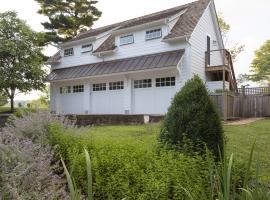
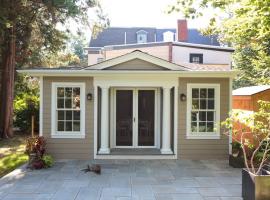
Exterior Solution
 The exterior of the addition is designed to beautifully enhance the existing house. This was created in many ways through the design and craftsmanship. First, a stone knee wall and water table were built to match the existing stone in color and craftsmanship. The water table was hand chiseled from stone slabs to match an existing side porch’s stone details, which were on the opposite end of the house. This created an elegant base and gives the impression that it was built with the original house. A custom built mahogany wood water table was installed directly above the stone to create a separation from the siding and the stone. This was mitered with tight joints, while at the same time using glue and screws to fasten them together. Large screws were also used in attaching it to the walls. Mahogany plugs were then made, glued and installed to fill in the screw holes. It was then sanded flush for a flawless finish (see picture above). Next, cedar shakes were installed above the water table to tie in the addition into the main house. Appropriate flashing was used as per the architect’s specification to prevent water from entering the building. The exterior corners of the cedar shakes were mitered and glued together with gorilla glue as per the manufacture’s recommendation to create the highest level of perfection in the craftsmanship. This creates a seamless look at the outside corners to enhance the beauty of the overall addition (see picture above). Inside corners were glued and lapped together as per the manufacturer’s specifications. Next, a continuous Azek historic sill was also added below all the windows, which created a separation between the cedar perfection shakes and the scalloped cedar shakes above. This continuous element was also used at the base of all the windows as a sill. Azek screws and plugs were used to attach the sill to the structure and all the joints were glued with PVC glue and nailed together. This was done to minimize the rate of expansion and contraction and to prevent the joints from opening over time. Because this continuous historical sill wrapped around the addition, extensive care was taken into account when laying out the elevation of the windows throughout the addition. Therefore, all the window head heights and sills had to be aligned perfectly straight and level in order to create these linear elements. This was done with a laser level during framing to mark all the window elevations in order to create uniform and straight lines in the trim. Scalloped shakes
 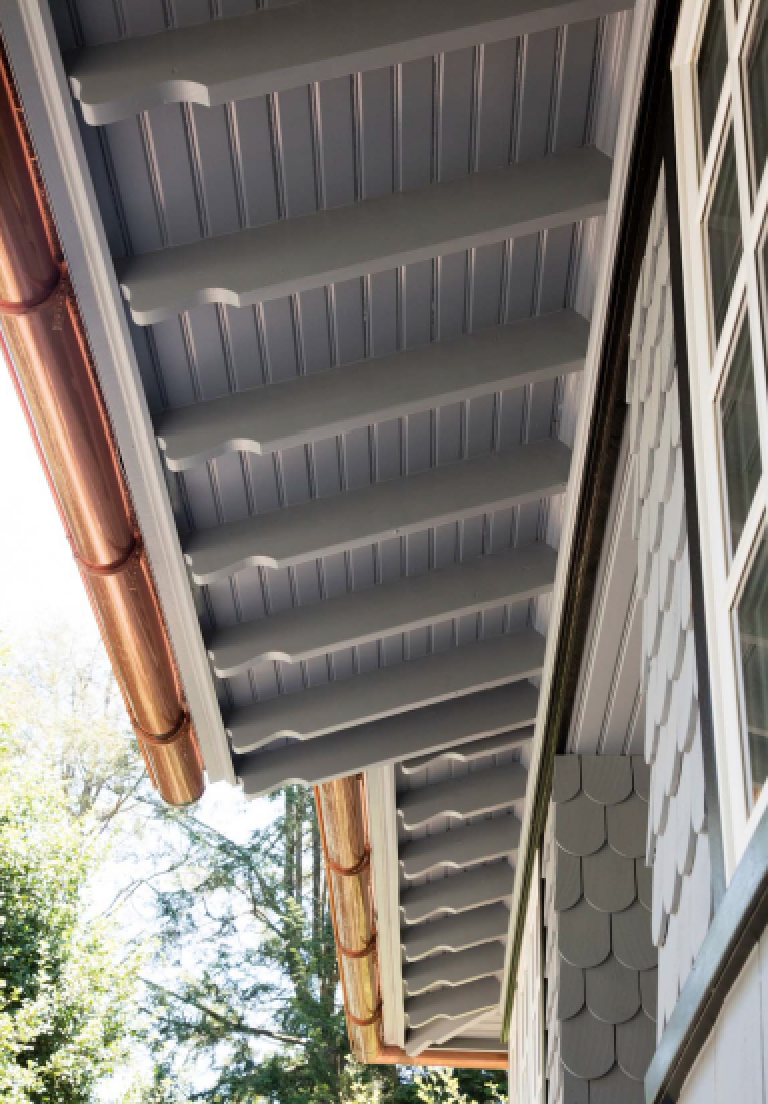 were then infilled between the windows, and great care was demonstrated in laying out the shakes so that all the corners worked together seamlessly. All installation methods were used in accordance with the manufacture’s specifications to accommodate expansion and contraction, as well as fastening. Flashing was also installed as required at all corners and sills. A continuous freeze board was installed on the head of the windows and consisted of two levels of trim and three different moldings to match the adjacent moldings of the existing house. This trim begins with a water table, which protects the windows and holds a two inch trim board above it. On top of this trim is bed molding attached to a second level of trim board. This also was used to finish the area between the rafter tails. Another set of bed molding was then attached to this and further finishes the area between the rafter tails and the seam to the eave. All of the trim joints were fastened together with glue and nails depending on the composite material. “Boral” trim was glued with exterior gorilla glue and PVC molding with Azek PVC cement. Tight joints were also constructed to create maximum binding of the glue. Finally, the rafter tails were exposed and the ends were shaped in a decorative feature to match the existing rafter tails of the house. The new 2x Douglas fir tails were created on site with a template copied from an existing rafter tail. The template was then used to efficiently make all the rafter tails uniform in shape and appearance. In order do this on site and minimize sanding, a system was set up in which one person marked the rafters with a template. The tails would then be cut with a jig saw, leaving an eighth inch of wood remaining. The second person then used a router with a flush cut bit and the template to finish router the tail to its finished size. Finally, it was lightly sanded to remove any rough edges. This method saved time and allowed every tail to be uniform and ready for paint (see pictures below). The distance off of the house for the eave also matched that of the existing house, with the exception of the overhang at the garage door and front entry, which extends out to three feet to allow cover from the elements. 1x6 beaded boards were then attached on top of the rafters to create the soffit. The roof edges were then completed with a rake molding and 2x cedar band above to match the existing house. The roof of the addition was also designed with a low pitch as to not interfere with the bedroom window above. Shingles were selected to match the existing house and copper valleys were installed to fit in with the original time period. Copper gutters and downspouts were also selected in shape and style to match that of the existing house. Together, the exterior elements work smoothly to create an addition, which fits perfectly with the existing house and at the same time, stands as a spectacular feature of the house.
Interior Solution
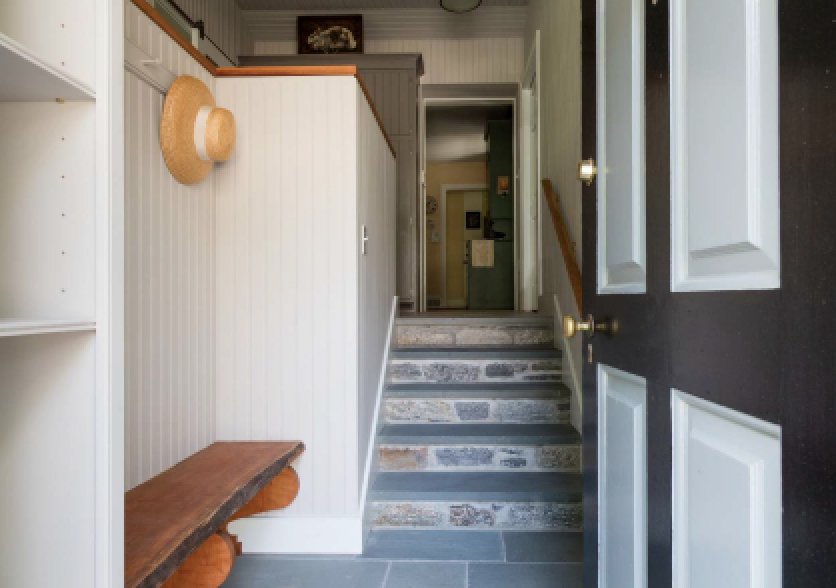
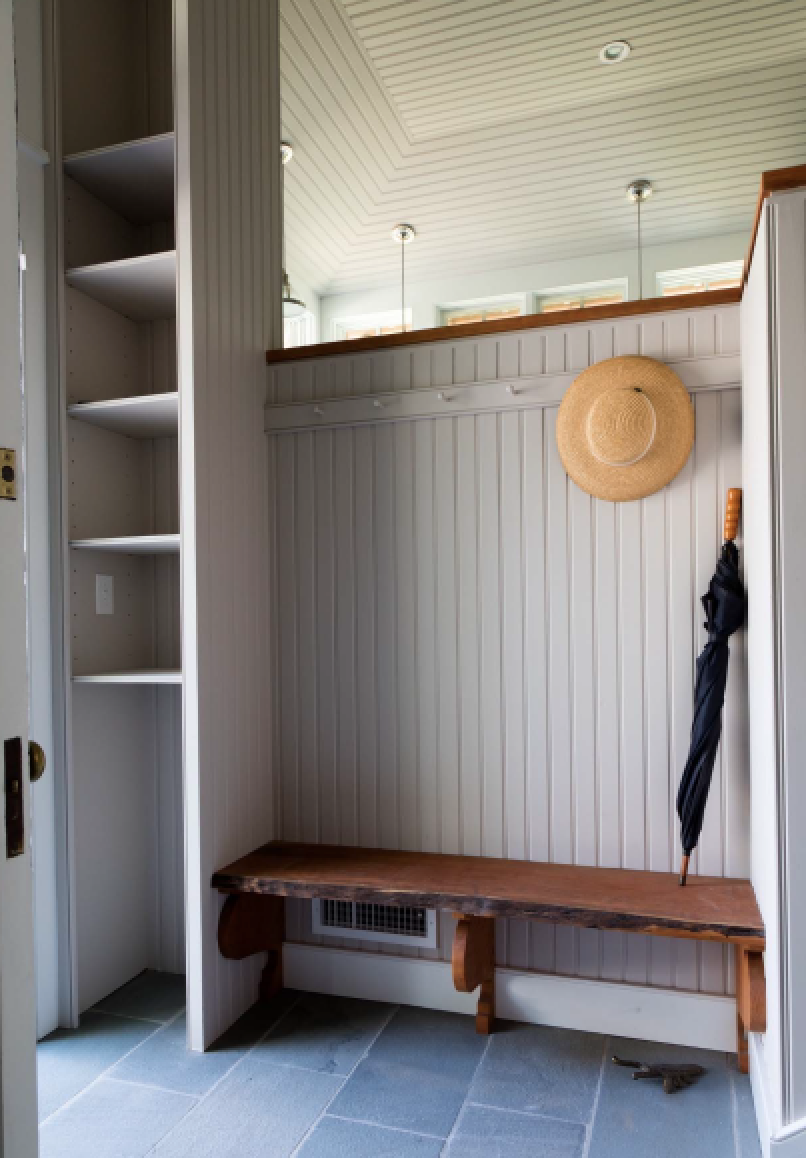 The interior is just as detailed as the exterior. And just as much care was planned to make sure that the quality stand up through the years to come. The addition can either be entered through the garage or from the driveway into the foyer. Once in the foyer, one is greeted by a cozy cherry bench and two separate cabinets flanking either side of the front door. The bench is made from a free‐formed cherry slab, which was supplied by the owner. The bench is supported by three large decorative brackets. The shape of the bench brackets were designed from an existing hutch bracket in the kitchen. The only problem was that the hutch bracket was too small to support the height of the bench. Therefore, we had to rescale the design to fit the bench proportions. Once the design was enlarged to fit an 18” high bench, the brackets were built in a woodshop and installed under the cherry slab. The bench was fastened in place with a combination of screws and biscuits in hidden places in order to create a blemish free cherry finish. Tung oil was used to create a low luster finish as per the homeowner’s request (see pictures above). A tall cabinet abuts the bench and runs from floor to ceiling. Because of the complexity of the space, this cabinet was built on site to maintain tight seams against the walls, ceilings, and floors (see picture above). A small cubbie cabinet was also built on site to fit into a recessed space to the other side of the entry door. Because there was not enough room to fasten the cabinet to the wall within the given space. The cabinet was built as one piece and designed to be integrated into the beadboard wall paneling. It was then slid into place and fasted at the front and base. This required carefull planning to ensure that the beads of the cabinet, wall and ceiling all aligned for a seamless and superior look. The result is a cubbie, which blends perfectly into its surroundings and allows the owner additional storage space (see picture to left). The Foyer also has a heated floor with a flagstone finish and leads a person up a set of flagstone steps. Once at the top of the steps, there is direct access to the existing kitchen. To the left of this opening are two tall cabinets (see picture below). The cabinet to the left in the picture was an existing cabinet which was removed from the old porch. The existing cabinet was then modified so that both top and bottom doors open as one unit and allow an ironing board to fit inside, as well as other tall items. The existing cabinet was placed here because the sides were in rough shape from dents and scratches. The cabinet to the right was built to match the existing one in size and shape. It is built to hold many smaller items with adjustable shelves. The top molding is new and finishes the top of the cabinet so it appears as if the cabinets have always been together. An alcove was also designed to the left of both cabinets to accommodate a barn door. This was created to allow the bathroom barn door to gracefully recess beside the cabinets. The barn door tolerances were also specifically detailed to provide maximum privacy into the bathroom. The space between the trim and the door was minimized by recessing the barn door hardware brackets behind the trim. This allows a 1/8” gap from the trim to the door and prevents visibility into the bathroom when it is closed.
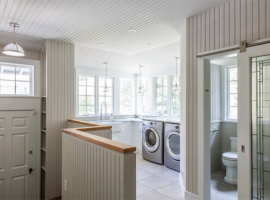
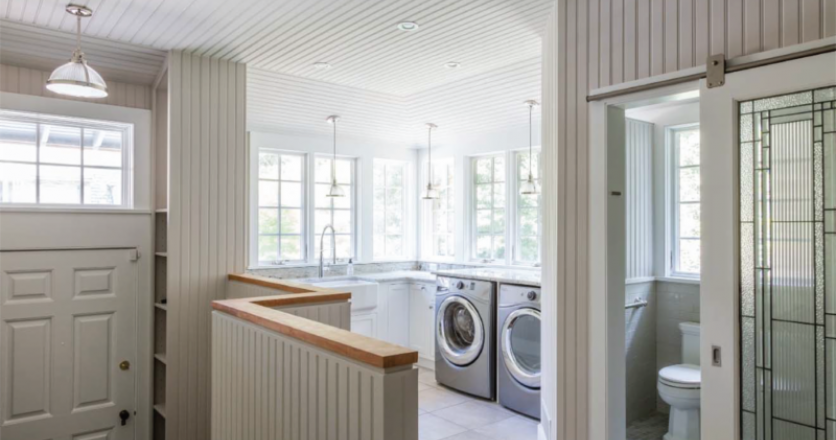
 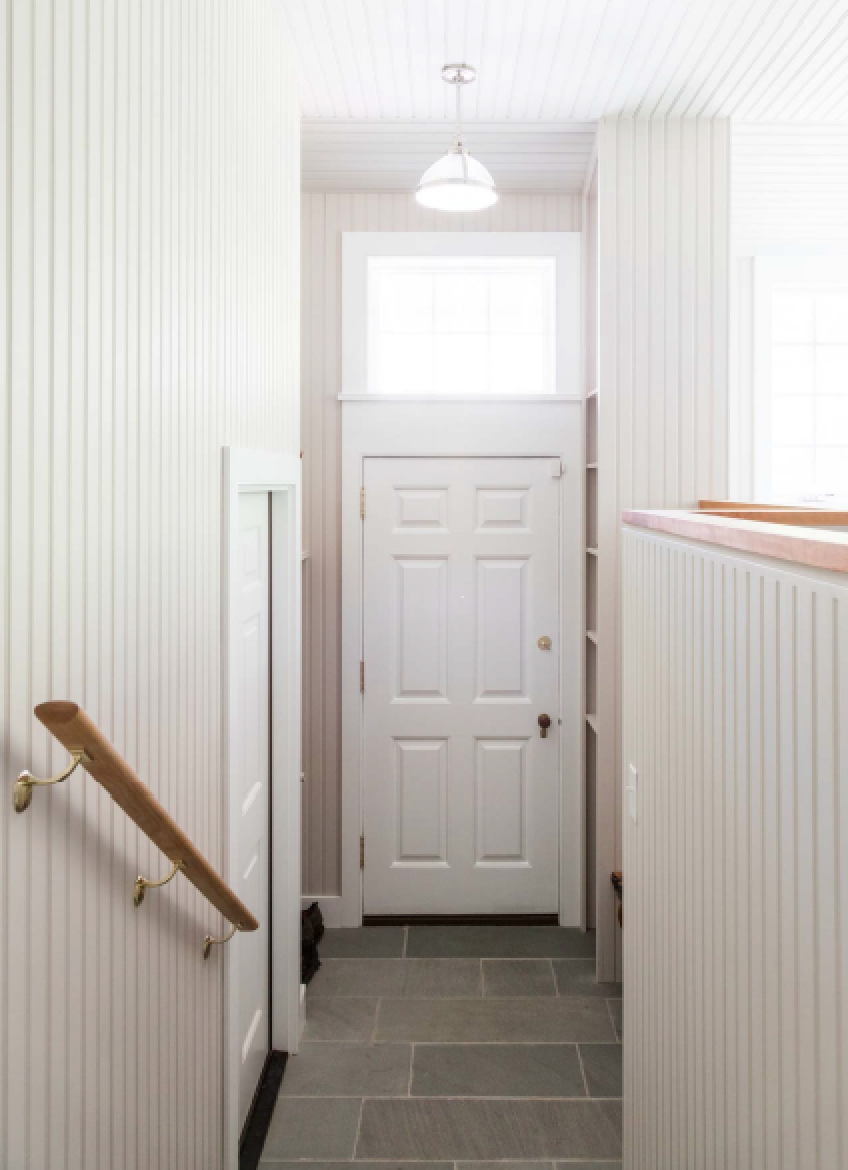 Also, when the door is closed, the door just covers the bead on the trim. This creates a unique aesthetic and enhances the overall performance of the door. (See picture to left). Behind the door is the bathroom, which includes a curbless shower and toilet. The owner did not want a sink in the bathroom because the laundry sink was so close. The floor is composed of 2x2 tile and the walls are a mix of tile and wood beadboard paneling. An opening was provided between the laundry and bathroom as per the owners request to provide as much natural light as possible into the bathroom. This created some difficulty when trimming the windows. Because all the window heads align, the trim also runs through from the laundry to the bathroom windows. Therefore, the head trim in these areas had to be continuous from the two rooms, while at the same time it had to be tight to the ceiling paneling. Next to the bathroom is the laundry room. This room makes use of inset cabinets, a farm sink, and marble countertops. A washer and dryer were also installed with a marble counter work area above. The farm sink is a handmade cast iron sink. This required some additional care when cutting out the face of the sink cabinet, since the sink was not perfectly uniform. The floors are heated ceramic tile selected by the owner. The mudroom finishes consist of 1x6 beaded paneled walls and ceilings. This took exceptional planning, since the ceilings were a hipped tray and the walls had various turns and angles. All of the beads were made to align where possible, so as to create smooth transitions between opposing joints. Great care was also taken into account in all the joints to make sure any movement was at the beaded tongue and groove joint opposed to the mitered joints. All joints were glued together to assure a stable and tight fit. Exterior joints and corners were nailed in addition to glue and sanded down for a seamless design. Interior joints and corners were screwed together in addition to glue to have a similar look. The result was a tight fitting work of art that will provide enjoyment for the clients for years to come. Next, a knee wall separates the laundry room from the foyer and entry steps. A cherry cap was constructed from the owners supplied wood and milled to fit with an existing design in the house. Since the wood stops at the end of the half wall, a miter down was constructed to eliminate any visible end grains. The joints of this cap were also glued with biscuits and pocket hole screwed at the underside to prevent the mitered corners from opening. A tung oil finish was also used on the cap as per the owner’s request. A ½” recess was placed directly below the wood cap with an additional wood trim, which was flush with the bead board. This created a straight line at the
top edge of the beaded wallboards and provided a unique finished element to the wall. Next to the entrance of the kitchen is a new closet, which is projected into the garage area. This will act as the new entrance for a future lift. In the existing kitchen a new exterior door was installed to allow the owners to walk directly outside to their new porch and existing rear patio. The sides of the door where flared to match the adjacent kitchen window, and trim was installed to match. The lighting of the new spaces makes use of both natural and artificial light. Task lighting is provided at the counter with pendants. While General lighting is delivered with recessed lighting throughout the space. Key pendants are also added in strategic areas to provide additional illumination and visual aesthetics. From the overall floor plan to the fine details and finishes, this new addition works perfectly with the client’s needs and creates a unique entry from the driveway while blending perfectly into the existing house.
Conclusion
 At the beginning of the project, the client started with no garage and a small closet in their kitchen, which held a washer and dryer. The original location of the laundry cabinet was not functional in the kitchen and was inefficient for the owner’s uses. By adding the addition, they were able to get a fully functional laundry room with a convenient entrance from the new garage and existing driveway. And because of the exceptional design and overall craftsmanship, our team was able to tie in the in new addition with its fine details and styles to fit perfectly in to the original house.