Heacock Builders Wins Contractor of the Year Award
RECENT POSTS
Heacock Builders Wins Contractor of the Year Award
We are excited to announce that we won a national Contractor of the Year (CotY) award for a detac
POPULAR POSTS


Heacock Builders Wins Contractor of the Year Award
We are excited to announce that we won a national Contractor of the Year (CotY) award for a detached pool house we recently renovated.
The National Association of the Remodeling Industry’s (NARI) Contractor of the Year Award is the premier recognition program for the remodeling industry. The program recognizes outstanding remodeling projects in 48 different categories. This year, we were the 2023 National/Regional CotY Award Winner for a Residential Detached Structure.
We are incredibly proud of the project, so we wanted to share it with you. Read about the challenges and solutions we came up with and to see the final results.
Project Summary:
The client came to our company to design and renovate their existing garage to accommodate a new pool house. It was to fit with the style of the main house, while maintaining the 3 bay garage for parking their cars. The owner requested that the new addition maximize the views to a golf course, which the property adjoined at the rear yard. An open floor plan was desired with a flexible space that was able to hold many guests for holiday dinner while also maintaining daily uses for the remainder of the year. A small kitchenette and bathroom was desired in the addition for that reason. A balcony was requested to overlook the existing pool and golf course. A few other conditions that were to be included was a space to hold an aerobic bike (facing the pool) and an outdoor shower.
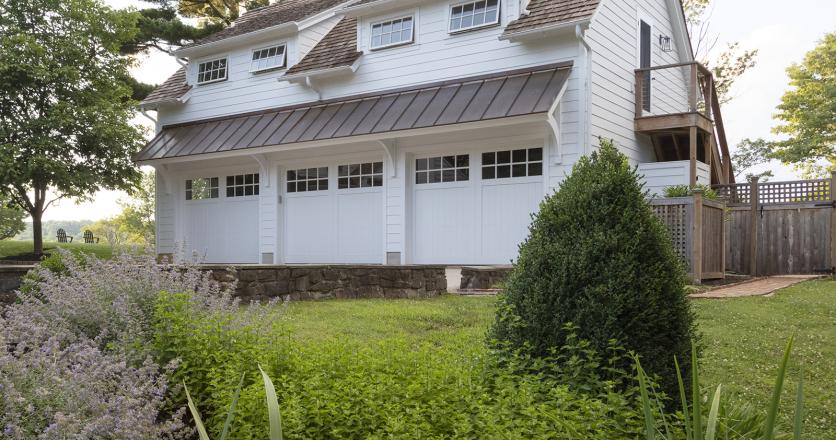
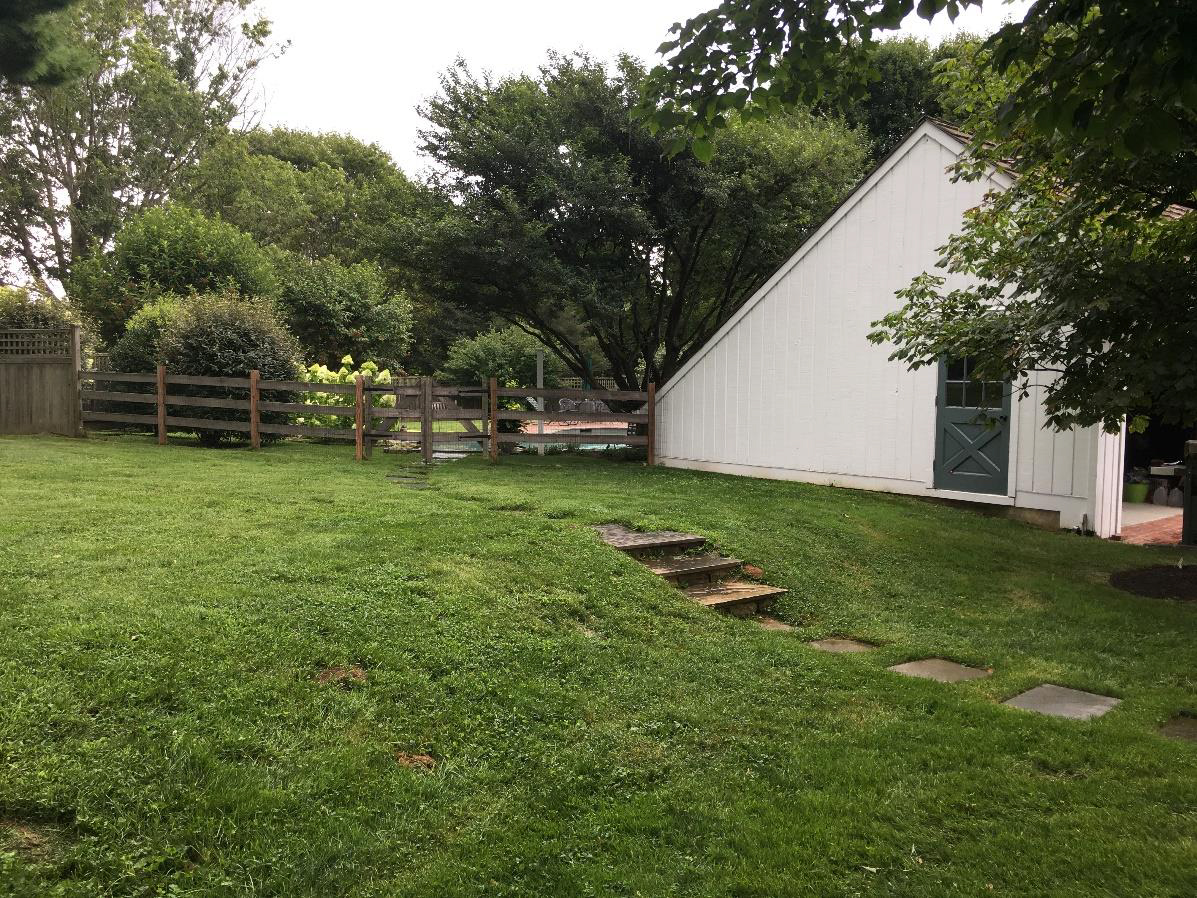
Before Pictures:
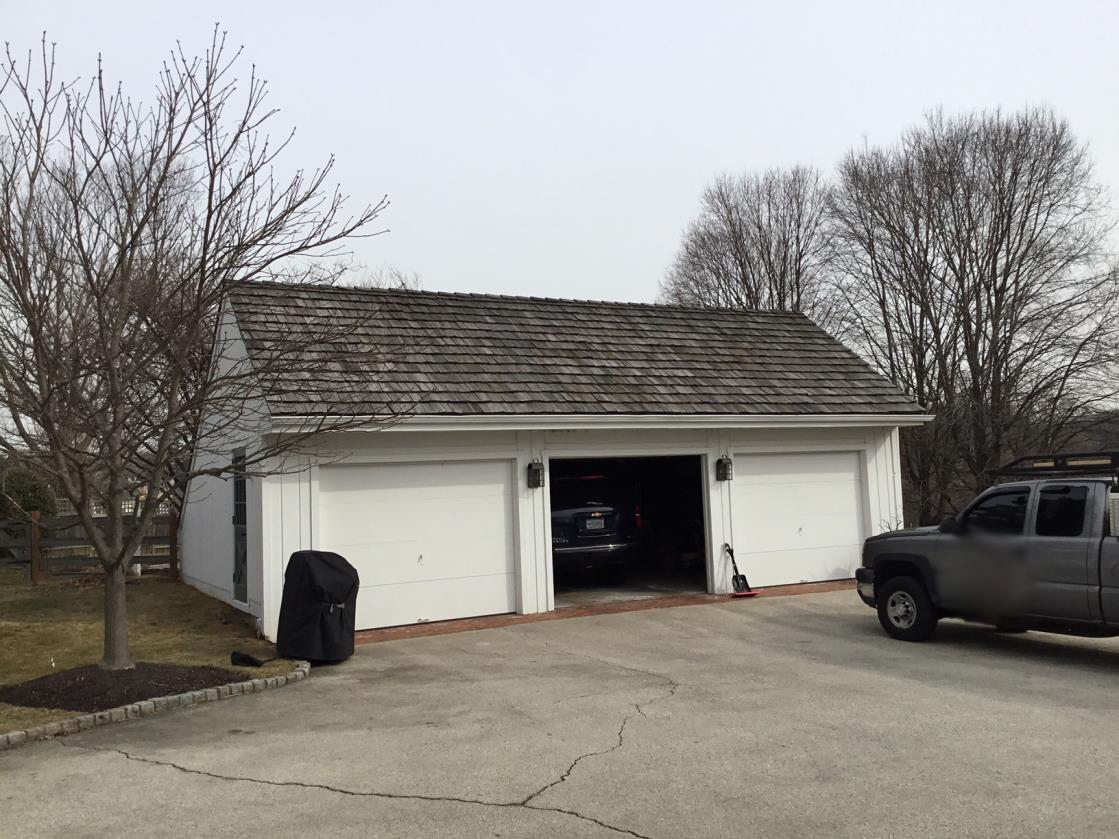
Front view of the existing garage
Side view
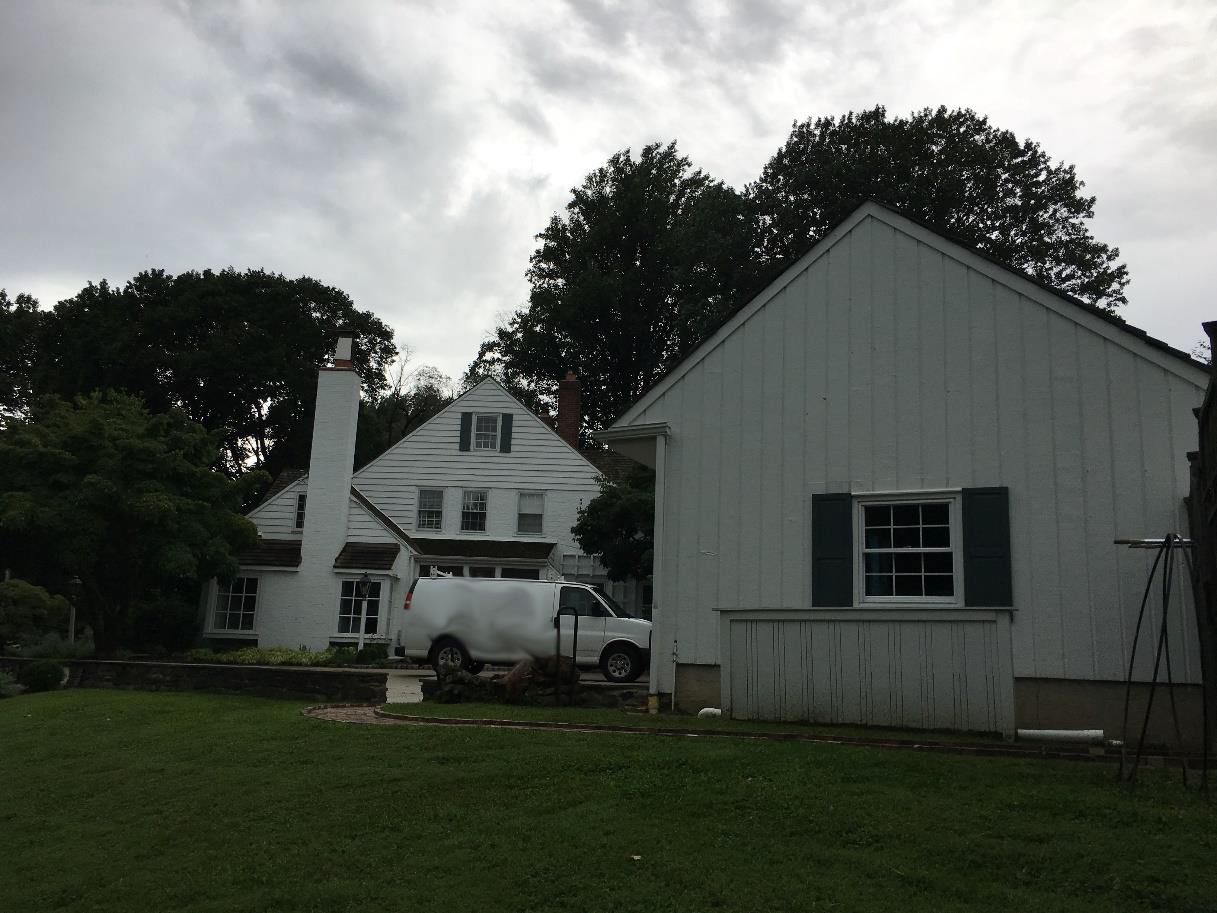
Side view facing the existing house
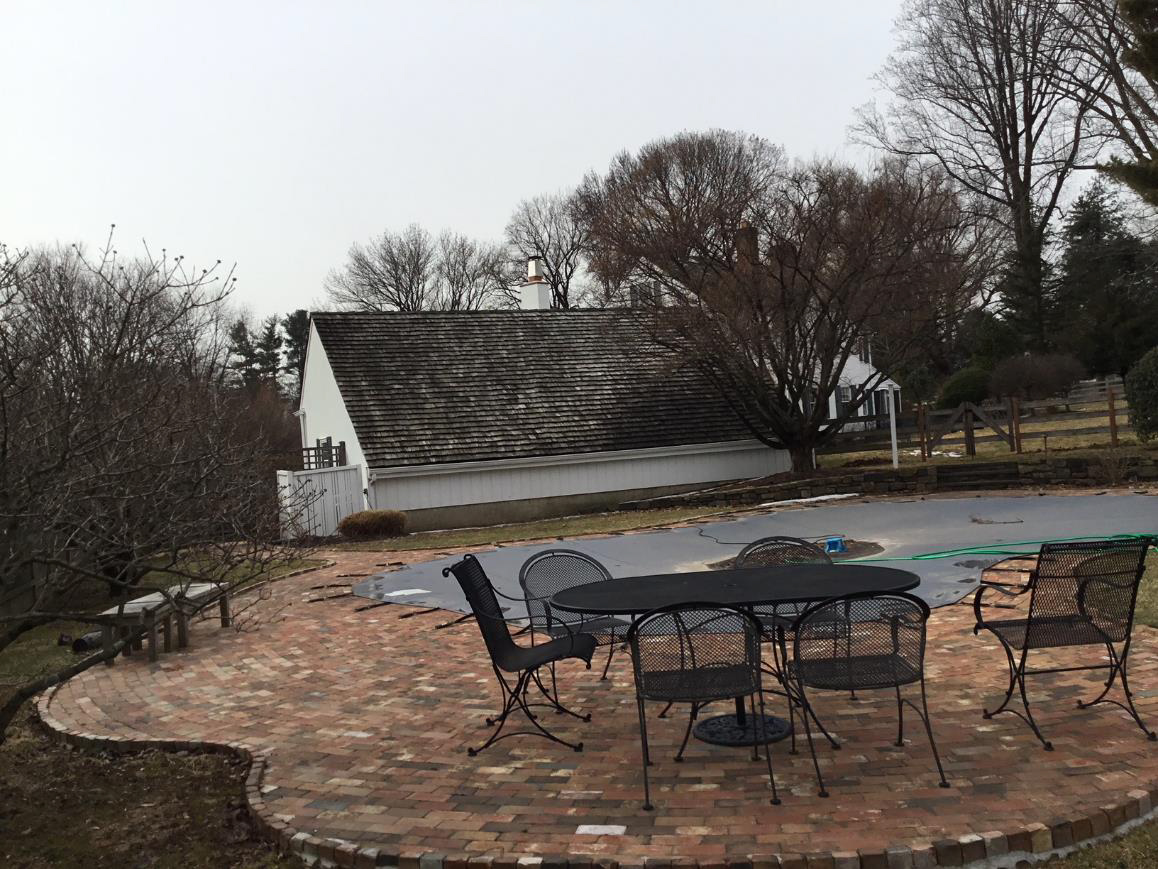
Rear view
Floor Plans
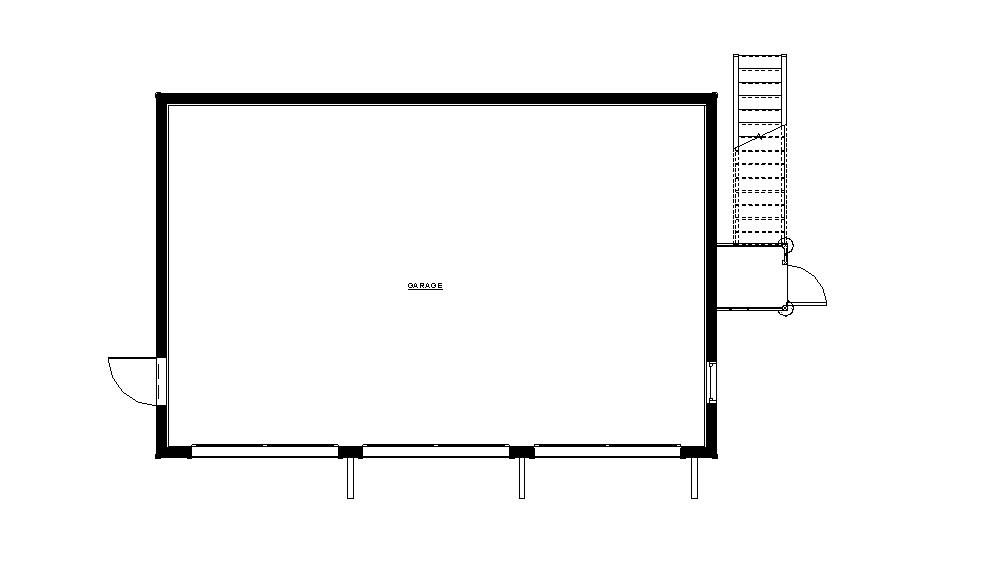
First Floor Plan
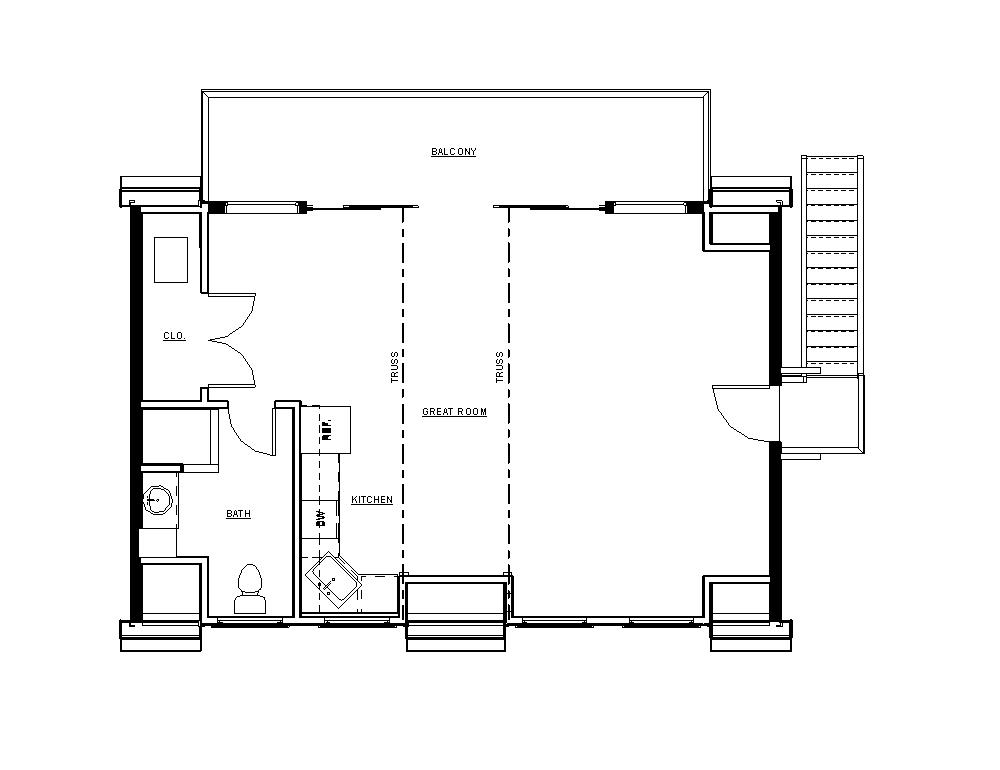
Second Floor Plan
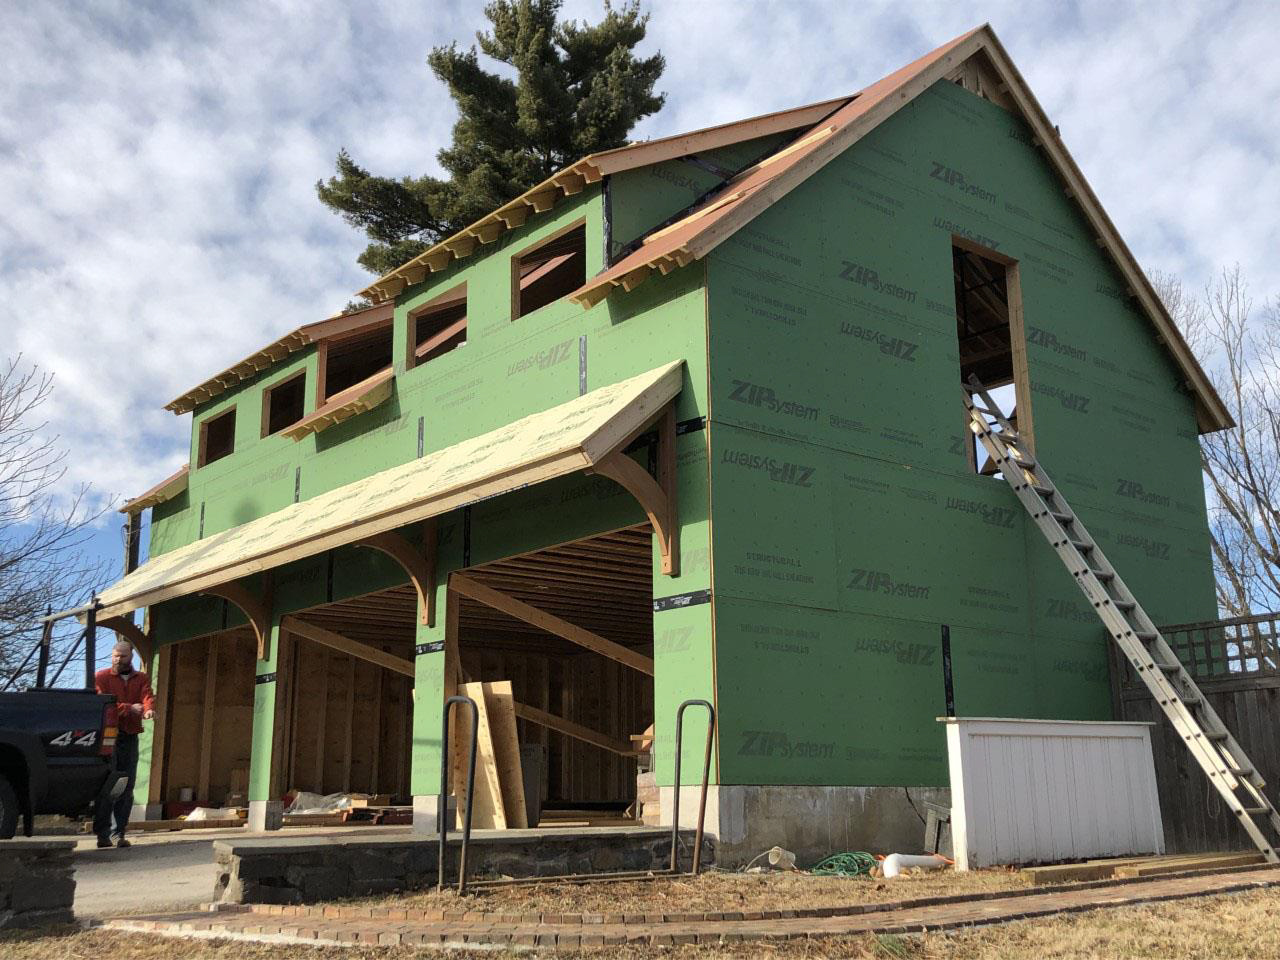
Obstacle #1
During the design it was discovered that because of the steep slope of the property, they were not allowed to add any impervious surface without a variance. They were also not allowed to have a second floor on the garage based on the zoning code. After speaking with the zoning officer, it was determined that a variance for a second floor was more likely to be allowed than getting a variance for added impervious. During the variance meeting the neighbors were very supportive of the project after seeing the projects design. It was approved without objection and we moved forward to construction.
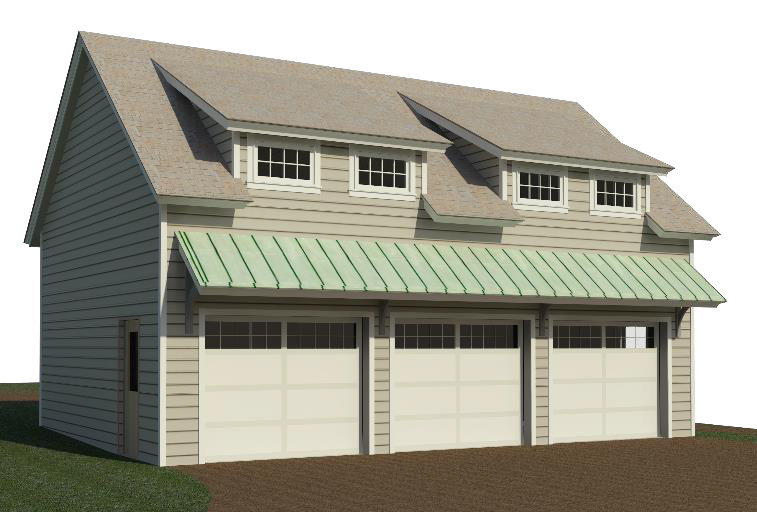
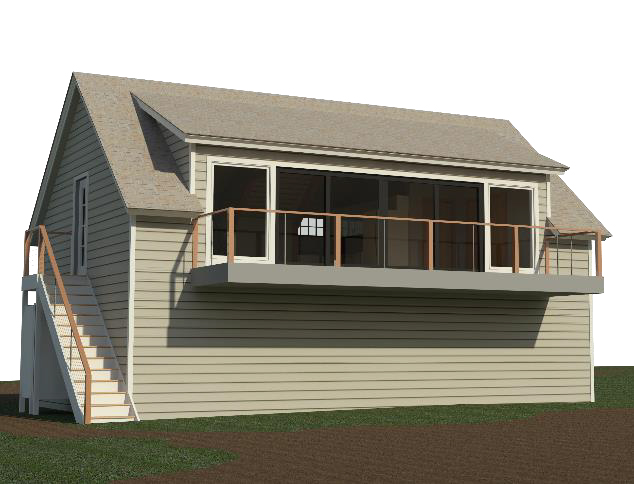
Proposed Design
Obstacle #2
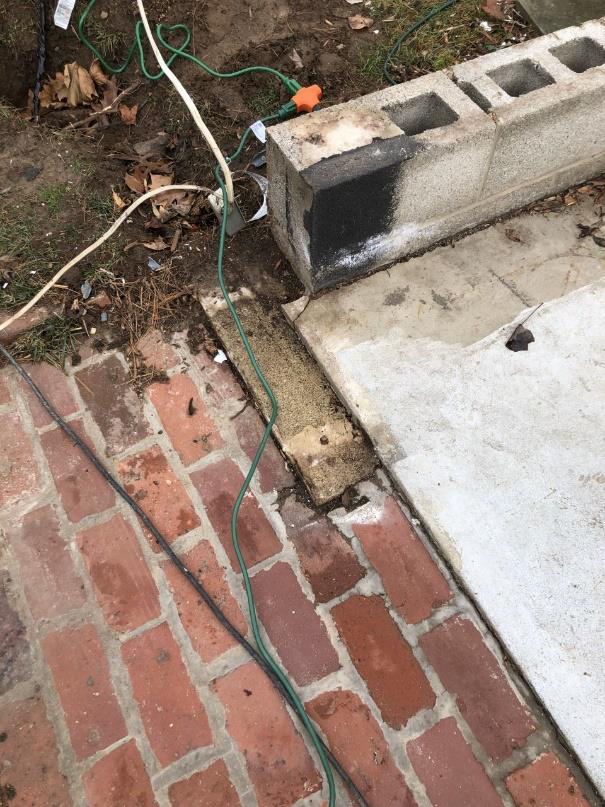
Problem:
- The existing foundation was deep enough and was to remain to minimize cost.
- The Foundation did not have a solid cap or any anchor bolt.
- Some areas did not meet the minimum distance to the top of the foundation above grade
Solution:
- Grout the existing blocks solid for added structure and add anchor bolts.
- Add masonry blocks as required to meet the code requirements (8” above grade)
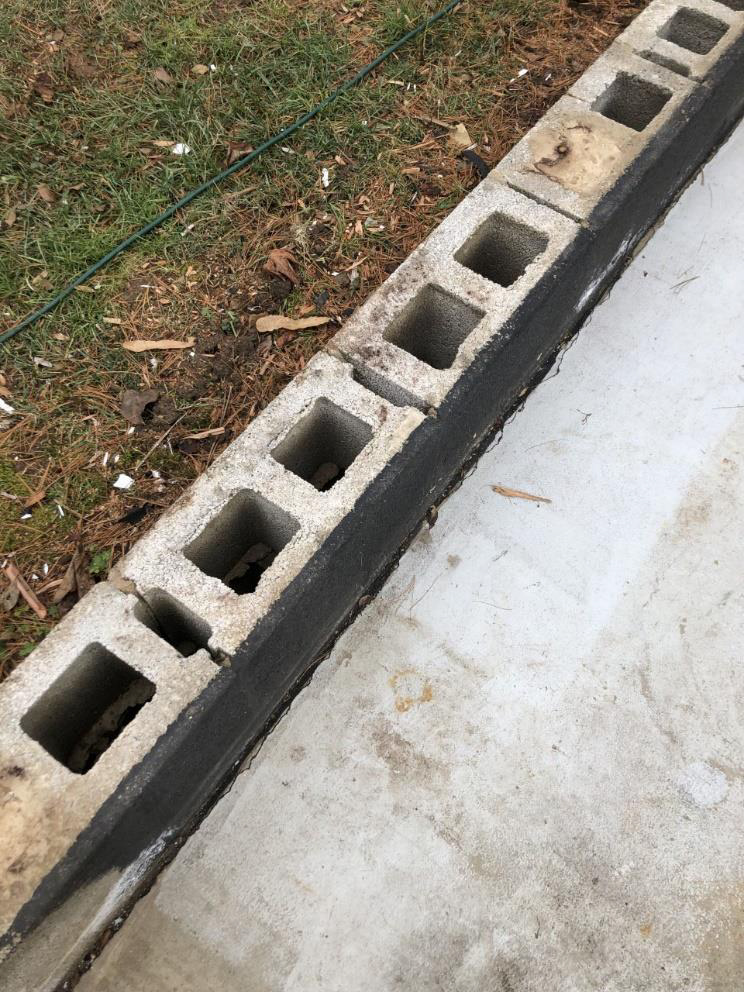
Missing block and anchor bolts in foundation wall
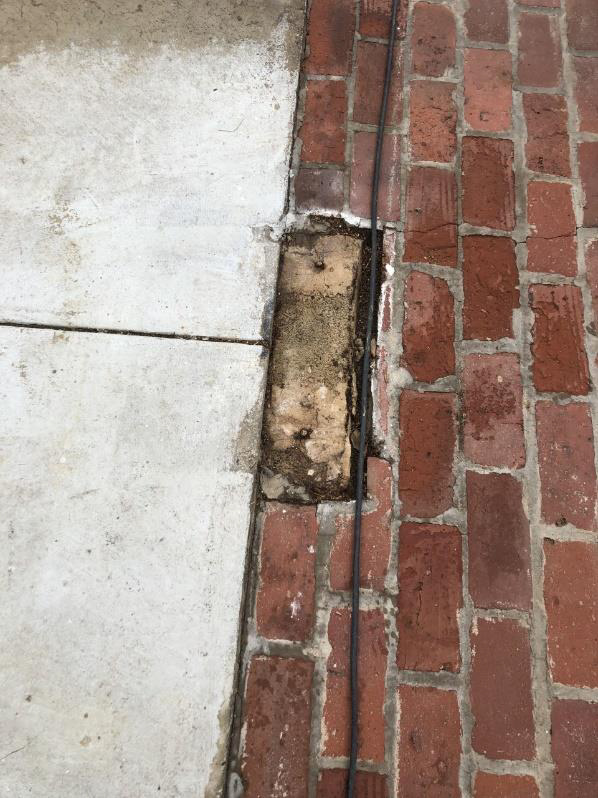
Foundation did not meet minimum clearance required above grade
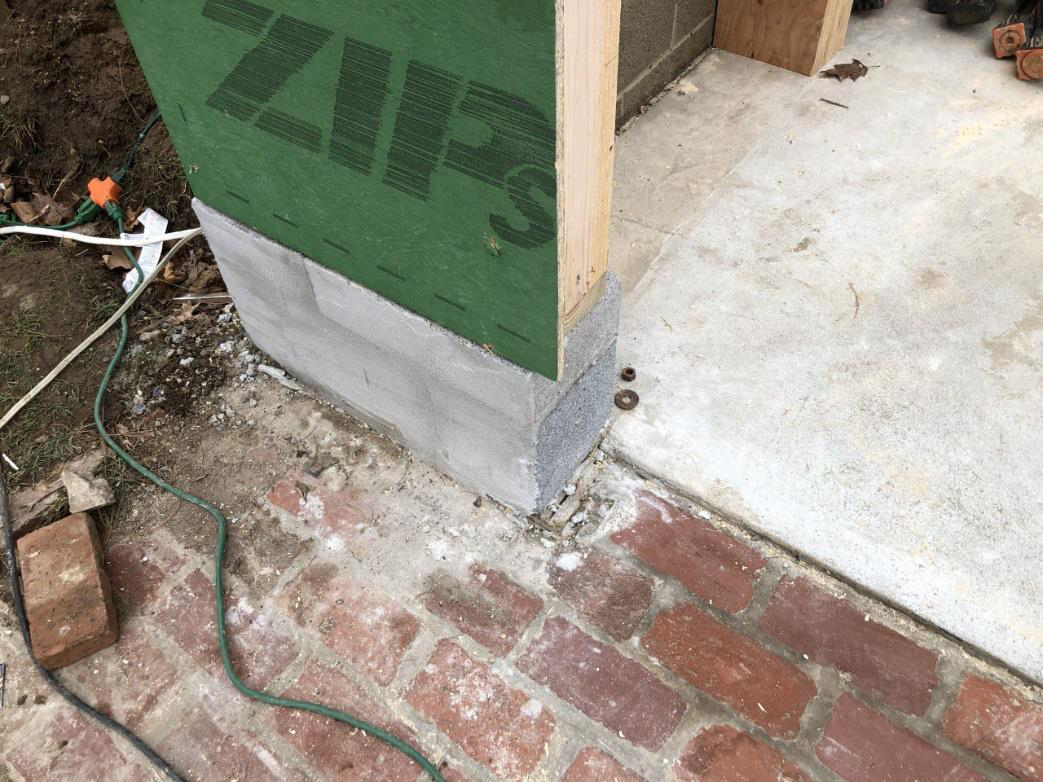
New block tied into the existing/ grouted solid
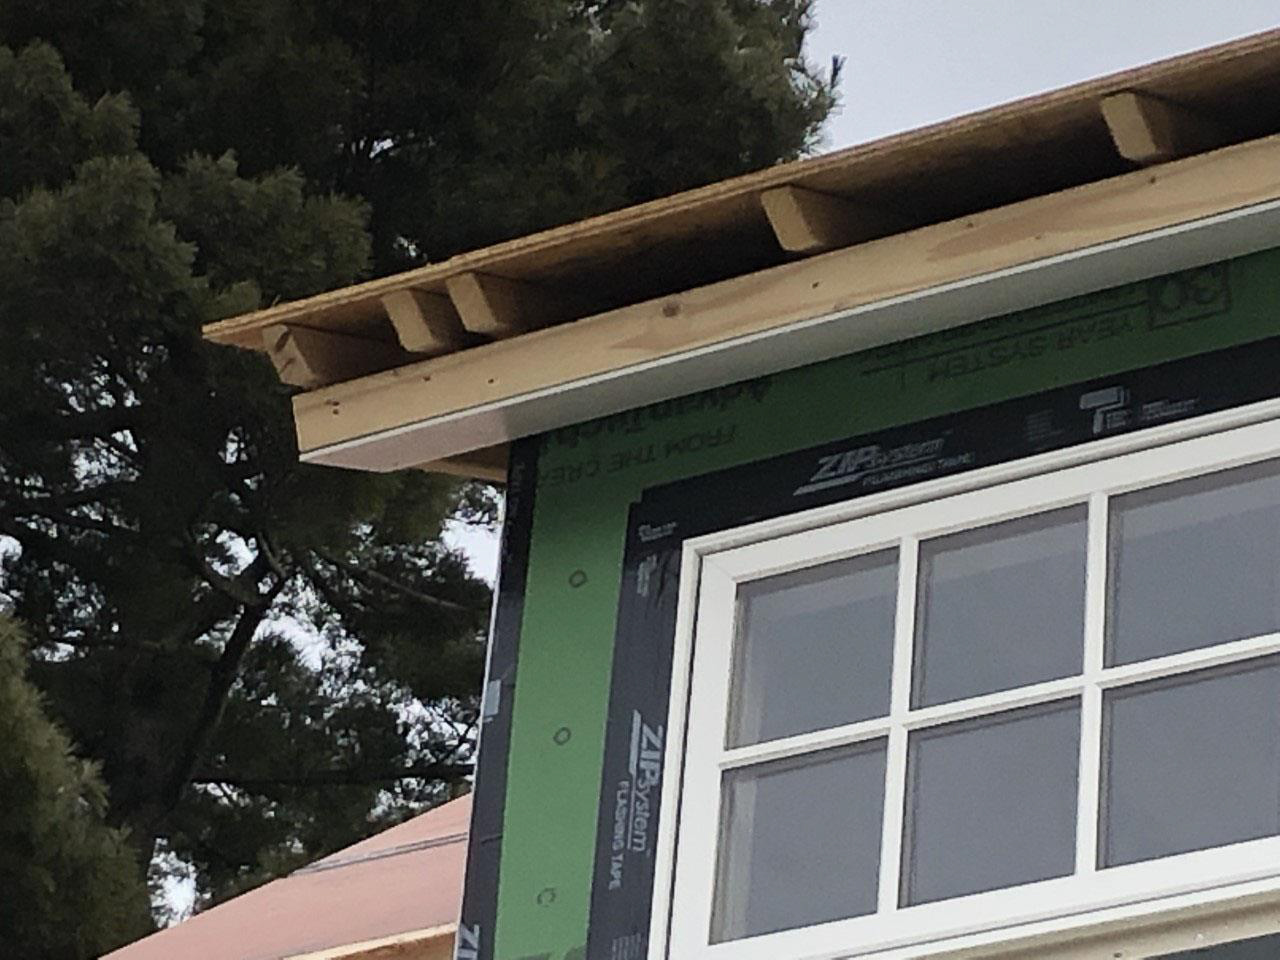
Obstacle #3:
Problem:
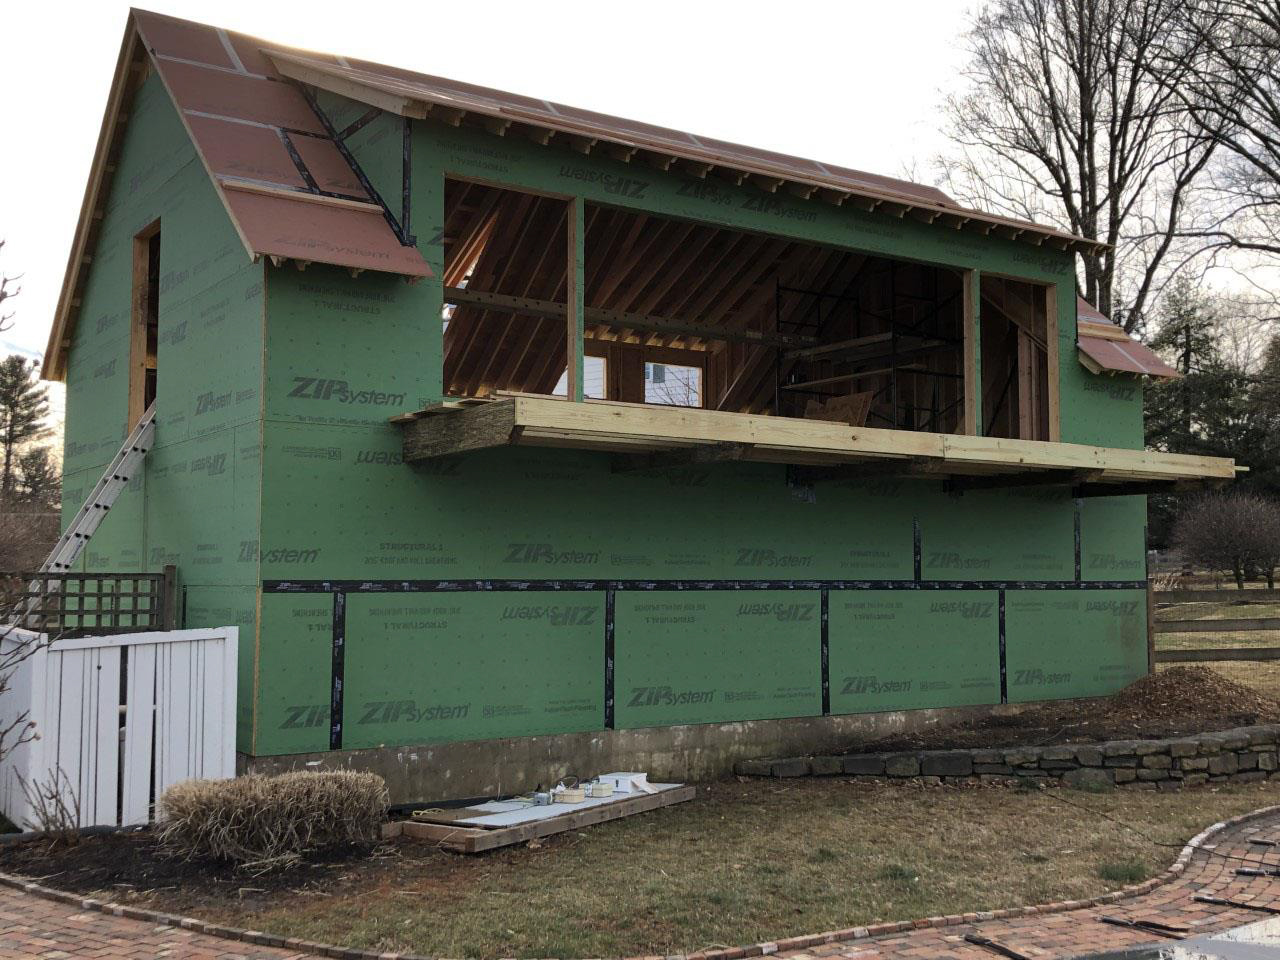
The rear balcony was to be cantilevered so that no posts would be extended down to the pool area.
Solution:
Large pressure treated LVL’s were installed
- We built first floor walls and had a lumber truck boom them on top of the walls to make it easier to set in place
- Flashing tape was added to the exposed tops of the balcony to keep water from penetrating the laminated grain
- Beams were strategically placed per engineered plans and the dormer layout to be centered on the rear of the house
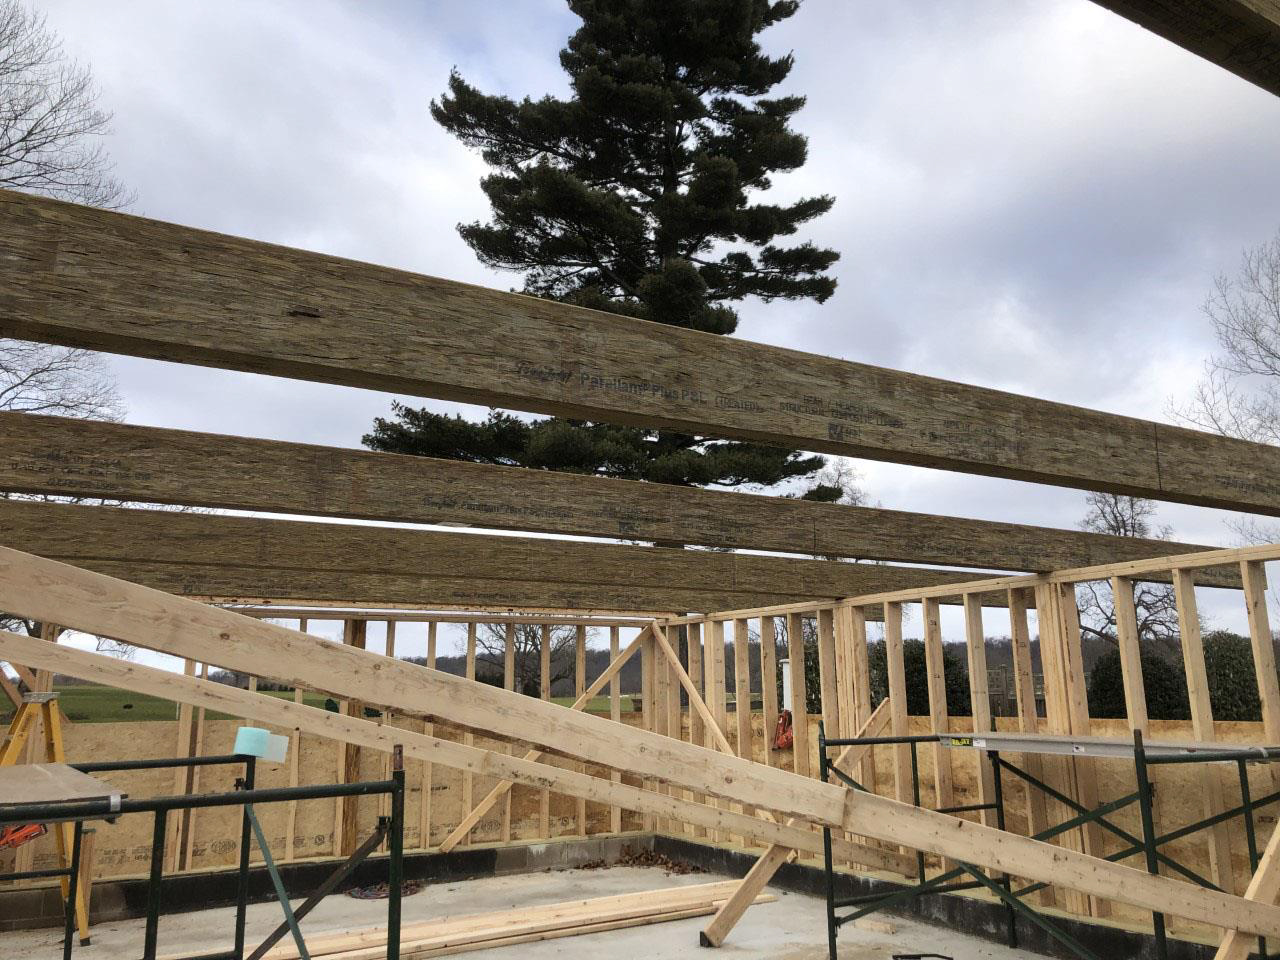
LVL’s set in place. Final beam length was cut in place.
Angles were cut in place on the deck to allow for a slimmer floor thickness.
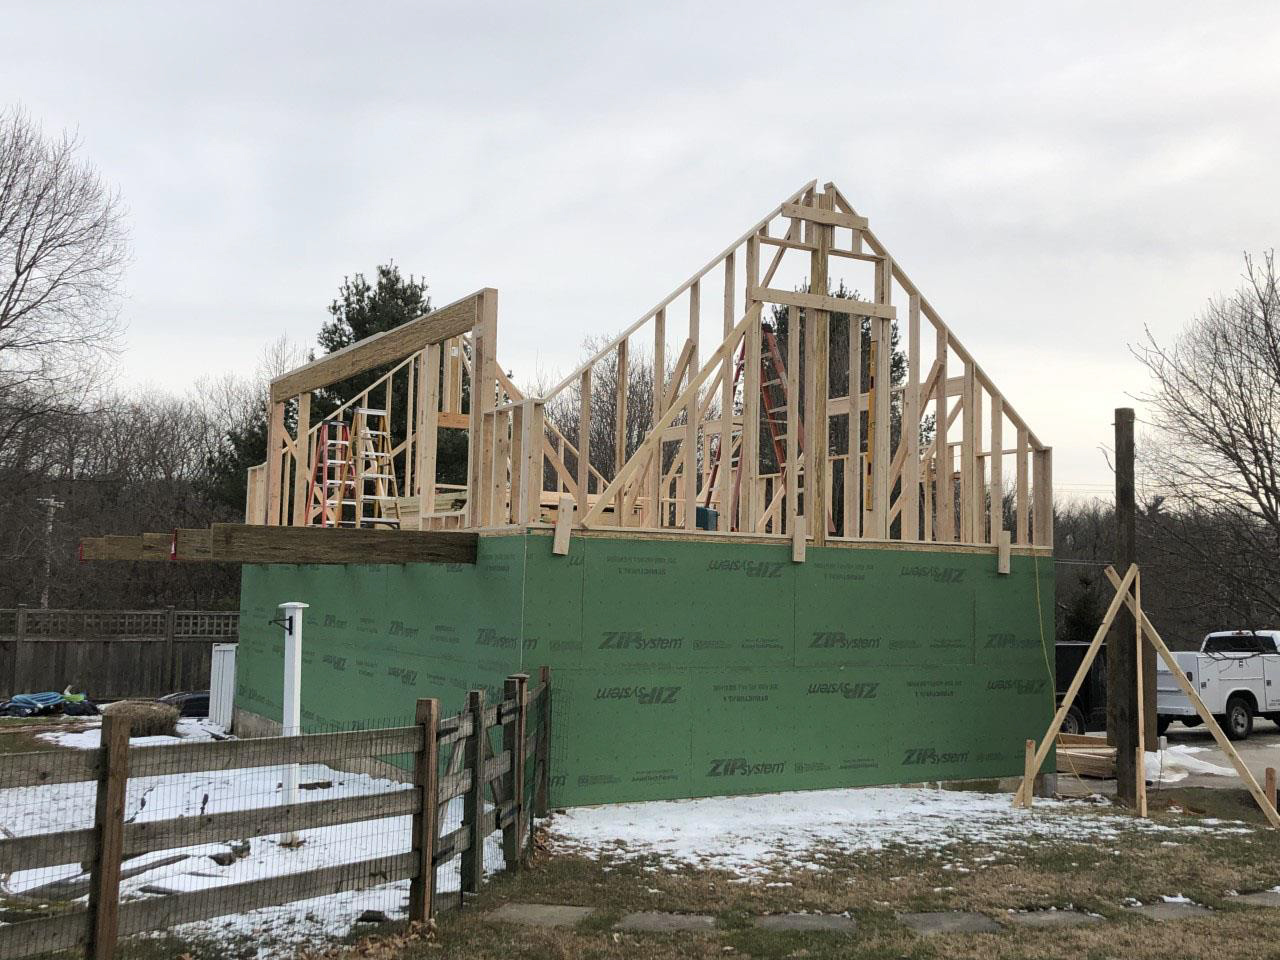
Obstacle #4:
Problem:
The second floor was to be a clear span. So a large 7x20 LVL ridge was engineered to support the roof.
Solution:
- We framed the gable walls to the roof angle so that there is no week point in the wall framing.
- The gable ends were laid out and framed on the ground and raised into place.
- Beam pockets were created on the gable walls to support the new beam.
- The beam was then set in place with a crane because of the weight and span.
- The roof rafters were installed after all the walls were built.
Framed gable ends with no horizontal joints
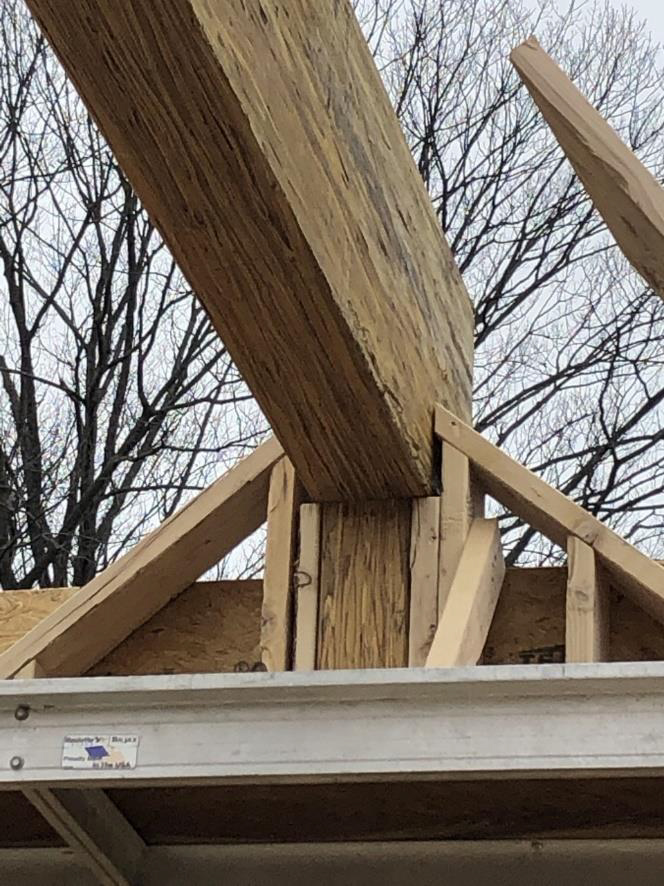
Framed beam pocket with beam installed
Obstacle #5:
Problem:
A 16 foot sliding glass door was selected to allow for views to the golf course. The window was extremely heavy and awkward because of its size.
Solution:
We framed supports from the ground to the rear deck to slide the window up. Intermitted supports were added to help support the door midway up. Several men were located at the bottom and several men were on the balcony to help lift it up and into place
Supports with door installed
Obstacle #6:
Problem:
- Trussed were desired to provide a desired appeal to the interior space
- It was determined that they couldn’t be structural because of the glass along the rear wall
Solution:
- It was decided to have Fake trusses so that it wouldn’t damage the glass door or windows with roof snow loads.
- Hidden fasteners were specified to allow the truss to look integrated into the walls.
- They were fabricated on site to fit the roof slope and appear to support the ridge beam.
- 4x8 Douglas fir was specified for the trusses
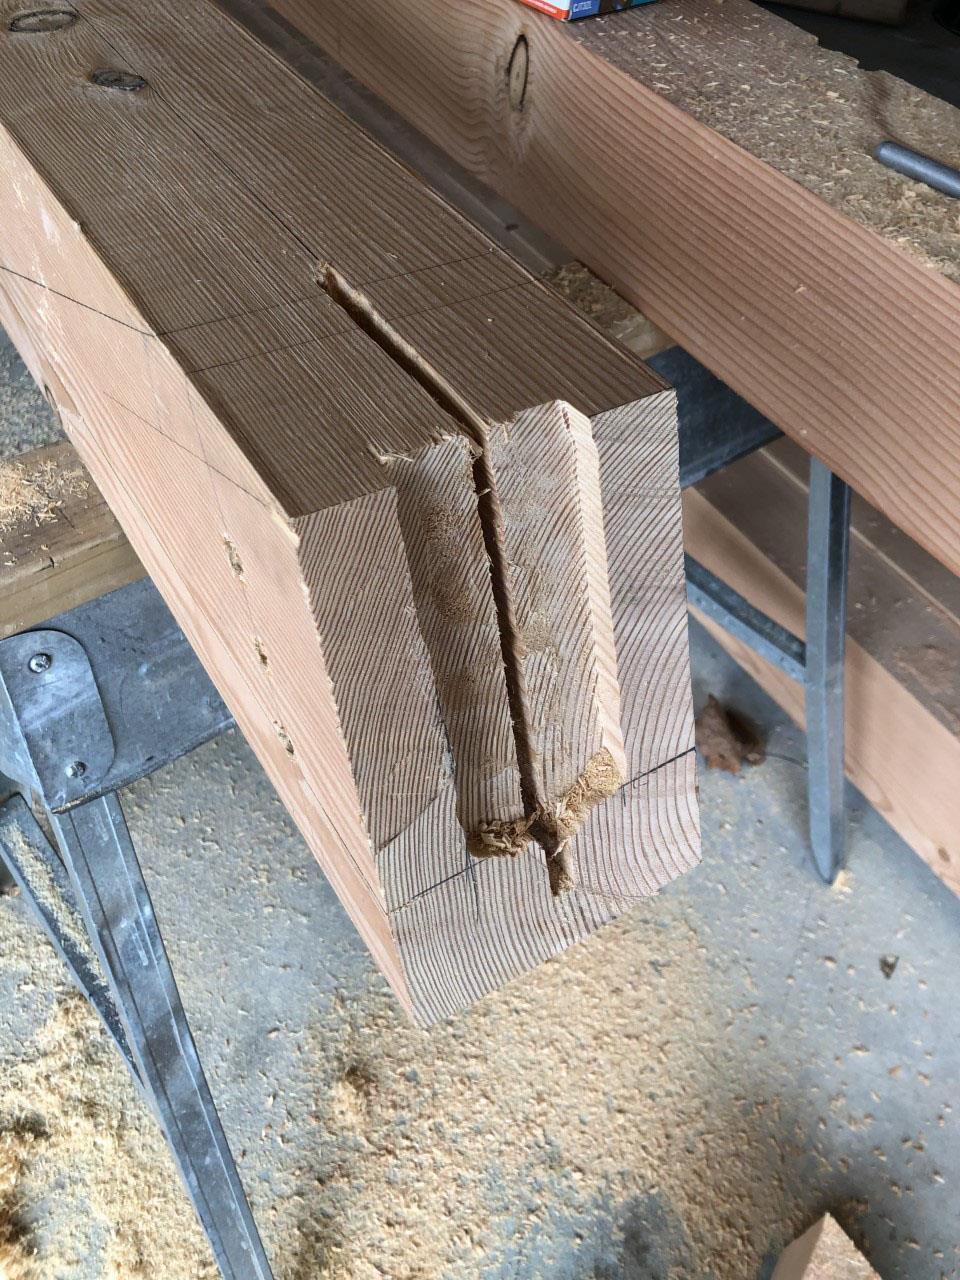
Truss ends were cut to the angle and routered/chiseled to fit the hidden fastener
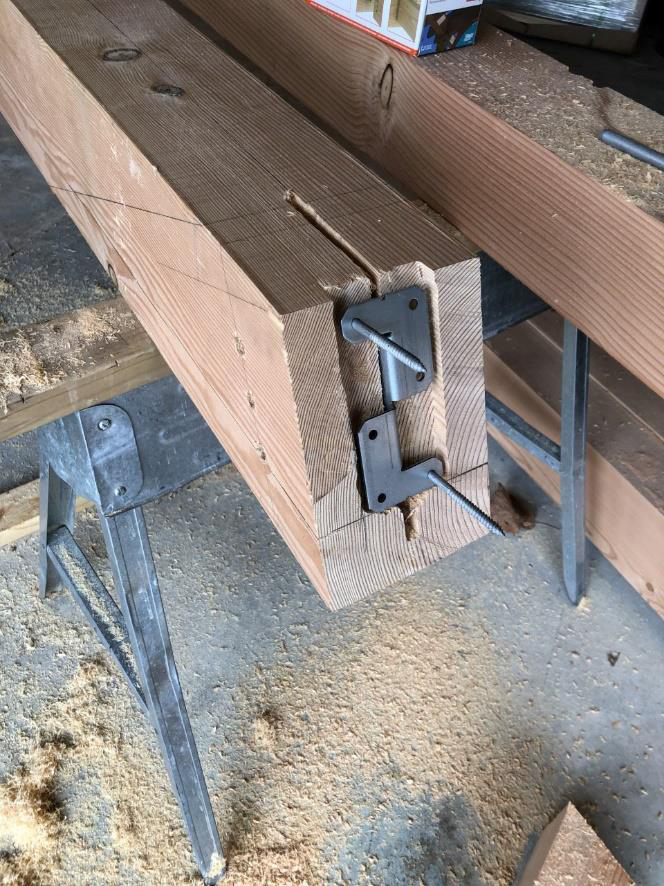
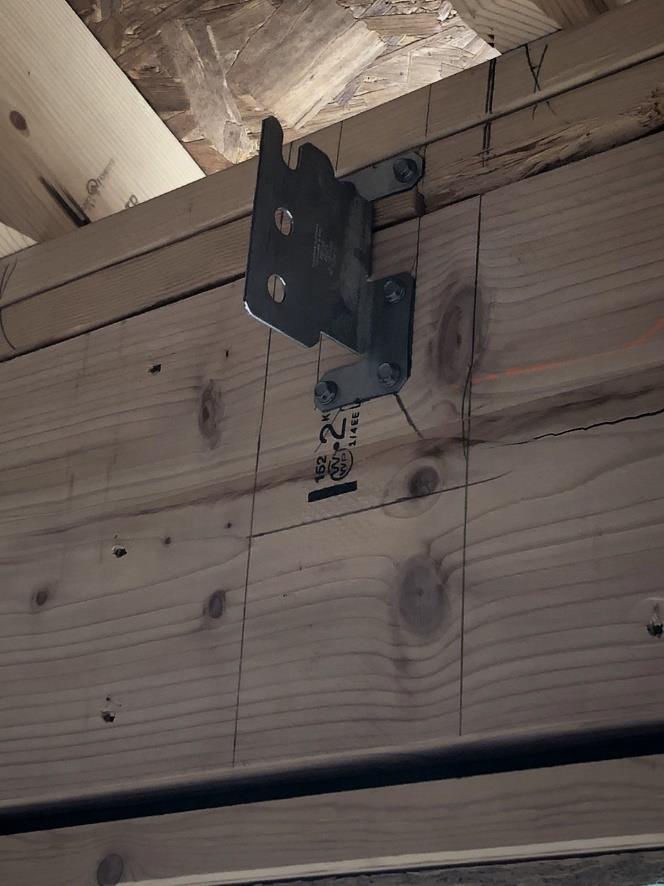
Hidden fastener shown in the truss member and installed on the wall. The slot cut out is facing against the roof and is not seen. Holes were drilled in the wood for steel peg to be inserted through the truss and into the hidden fastener. The pegs support the actual truss member. Wood plugs were then installed in the beam to give it a mortise and peg look.
Assembled truss
Obstacle #7:
Problem:
- The front of the garage/pool house was to have a pent roof over the garage doors with custom brackets to support it.
- There was no beam design to show in the roof.
Solution:
- Custom build brackets were fabricated out of mahogany to resist the weather.
- Frame the roof as a sip panel to support on the brackets and anchor it to the wall.
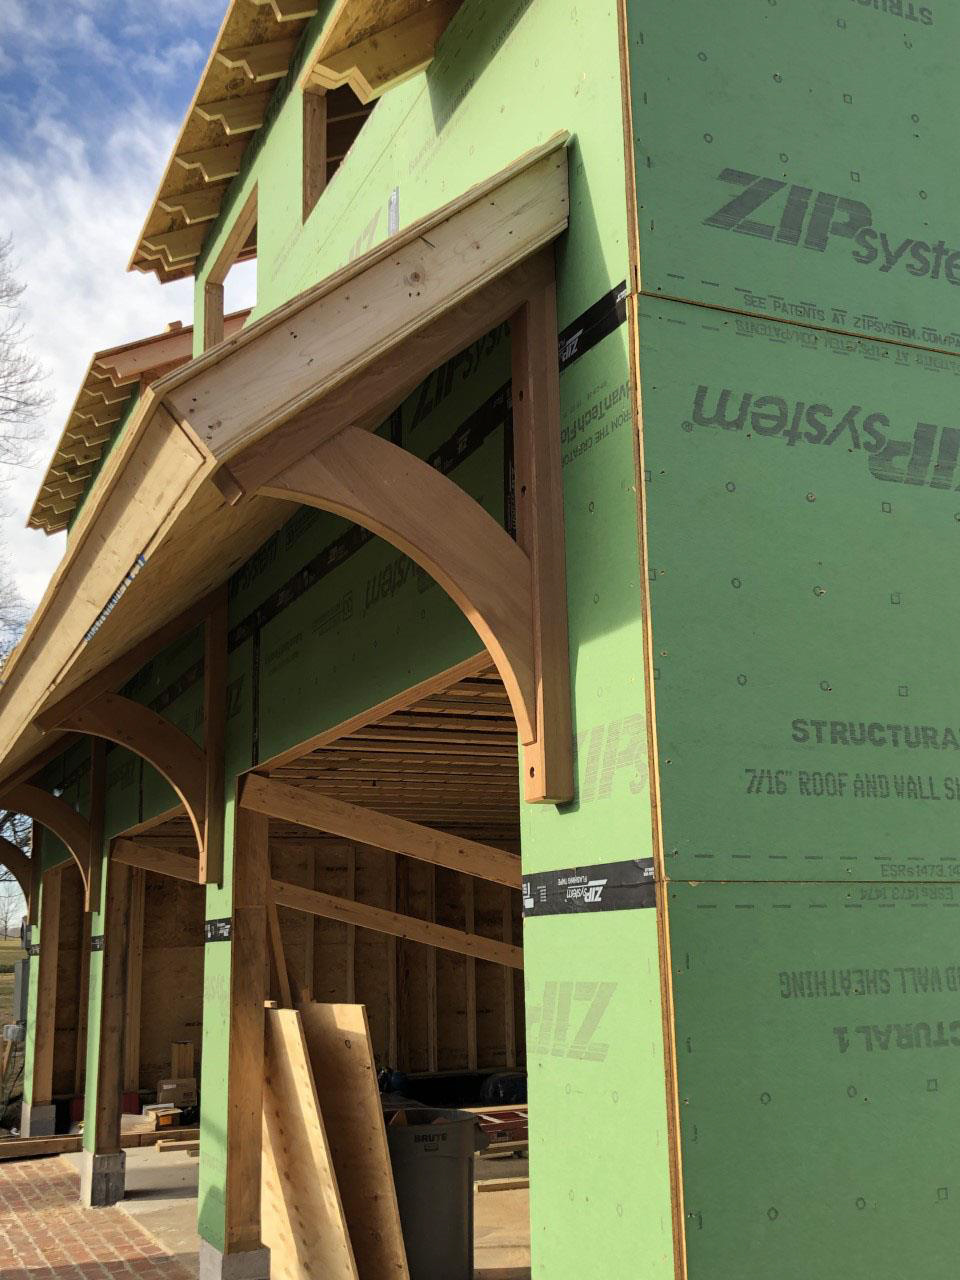
Custom mahogany bracket (built in our shop)
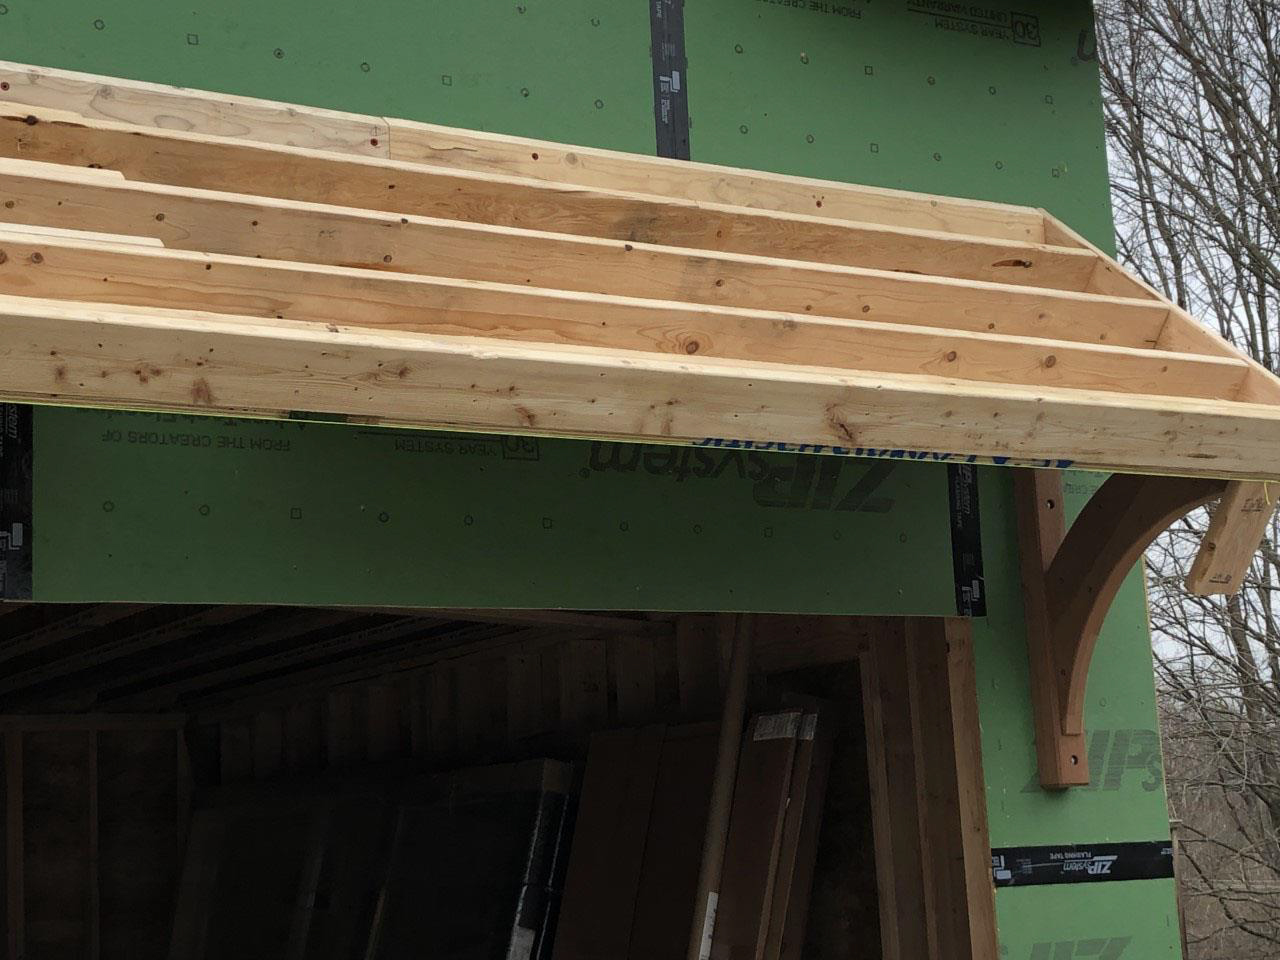
Plywood was installed on the brackets first. Then the framing was installed at 12” o.c. and nailed from the ¾” plywood below. A 2x6 was anchored to the wall.
A ¾” layer of plywood was nailed on top of the framing to create a sip panel.
Miscellaneous Deails
Rafter tails were cut to the angle of the crown molding to make it easier to install and added support.
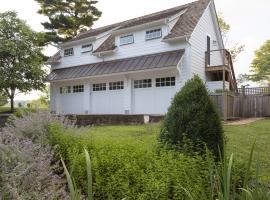
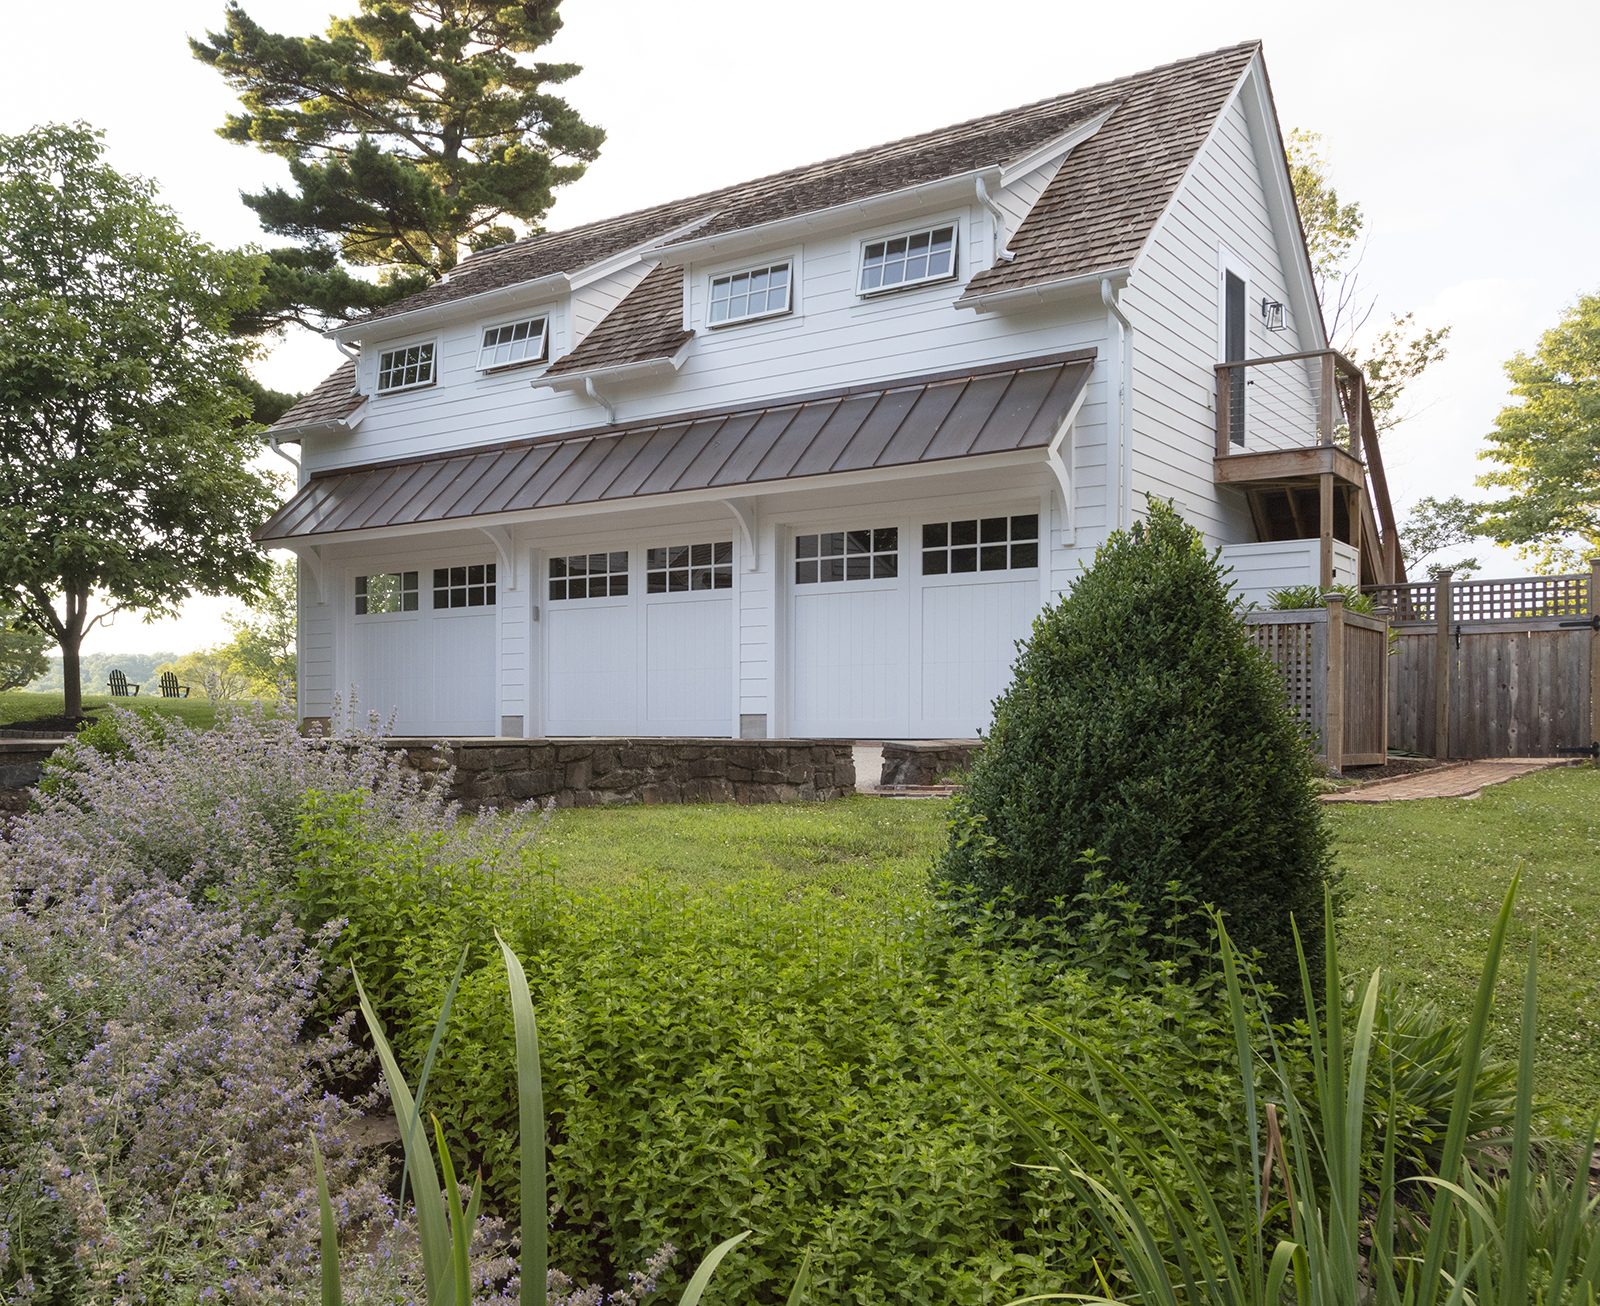
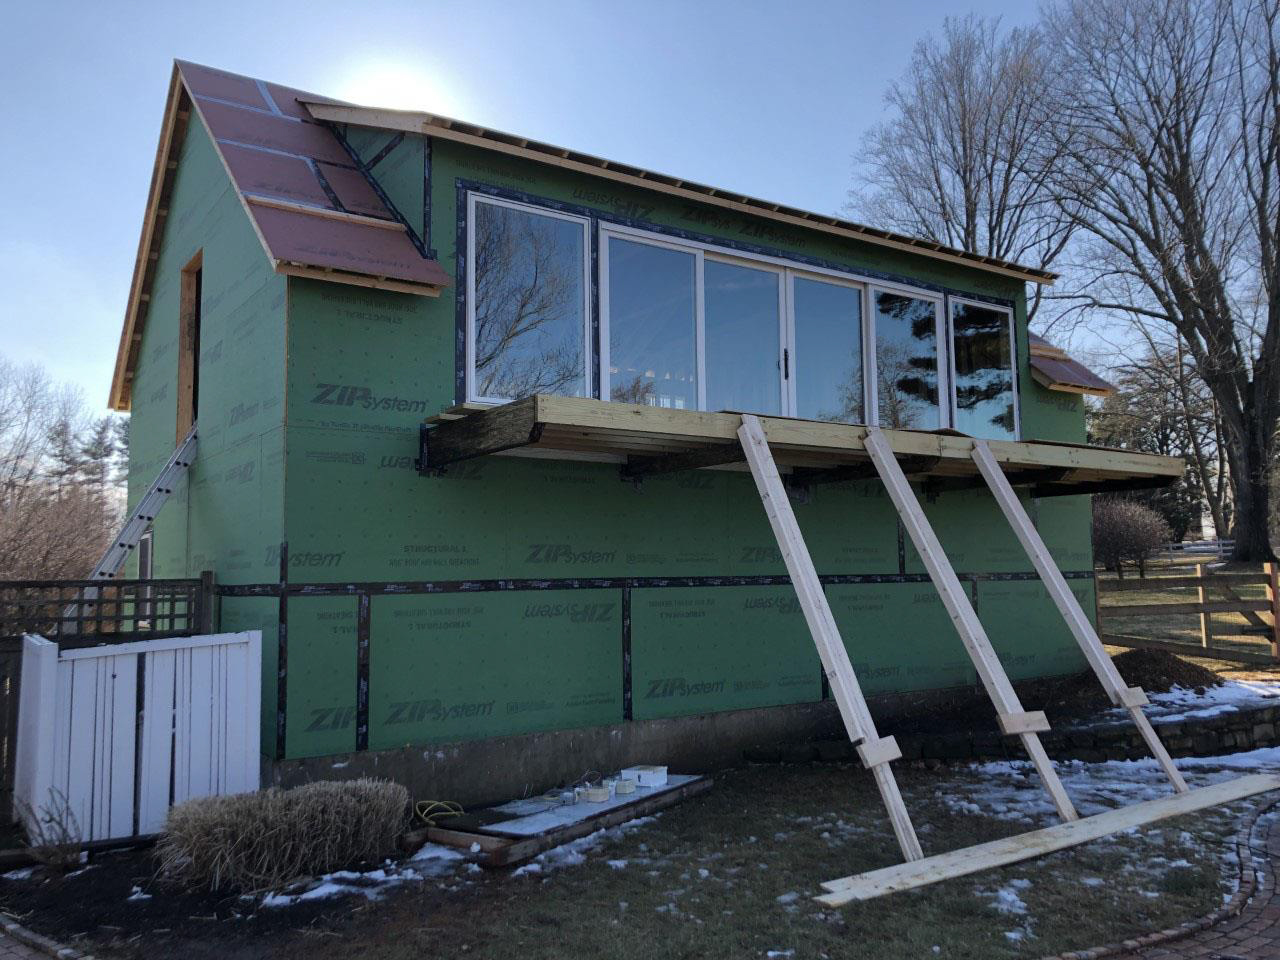
Final Product

Front view.
- Finished pent roof with standing seam copper roof
- Boral fascia (all seams glued) and Hardie soffit
- Crown molding along roof perimeter (all seams glued with azek glue)
- Hardie lap siding
- Cedar shake roof
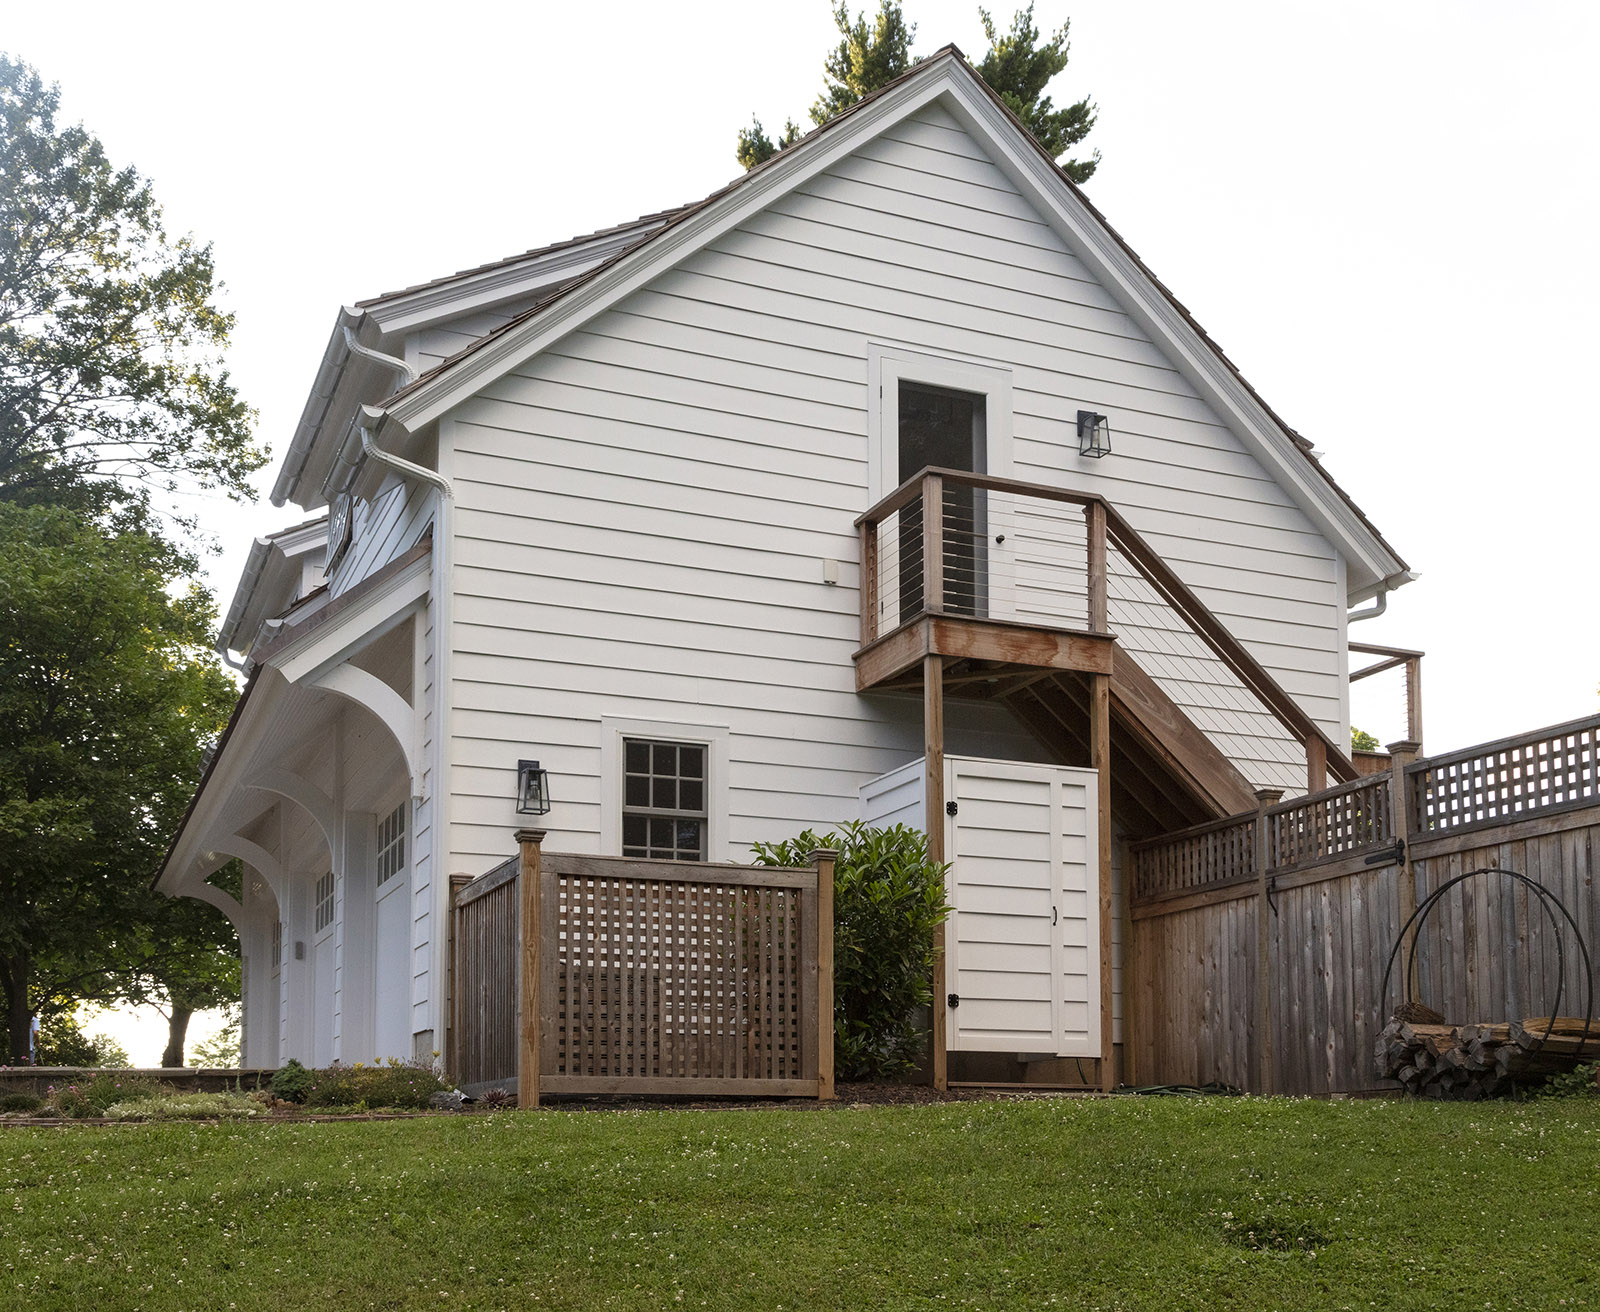
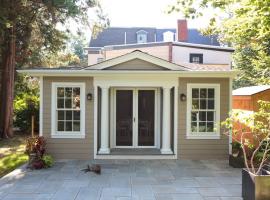
Side view showing outdoor shower under the stairs.
- Enclosed shower under stair landing. Spring hinged custom door to look like siding
- Waterproof panels lining the inside of the shower
- IPE Steps and railing with cable rail system
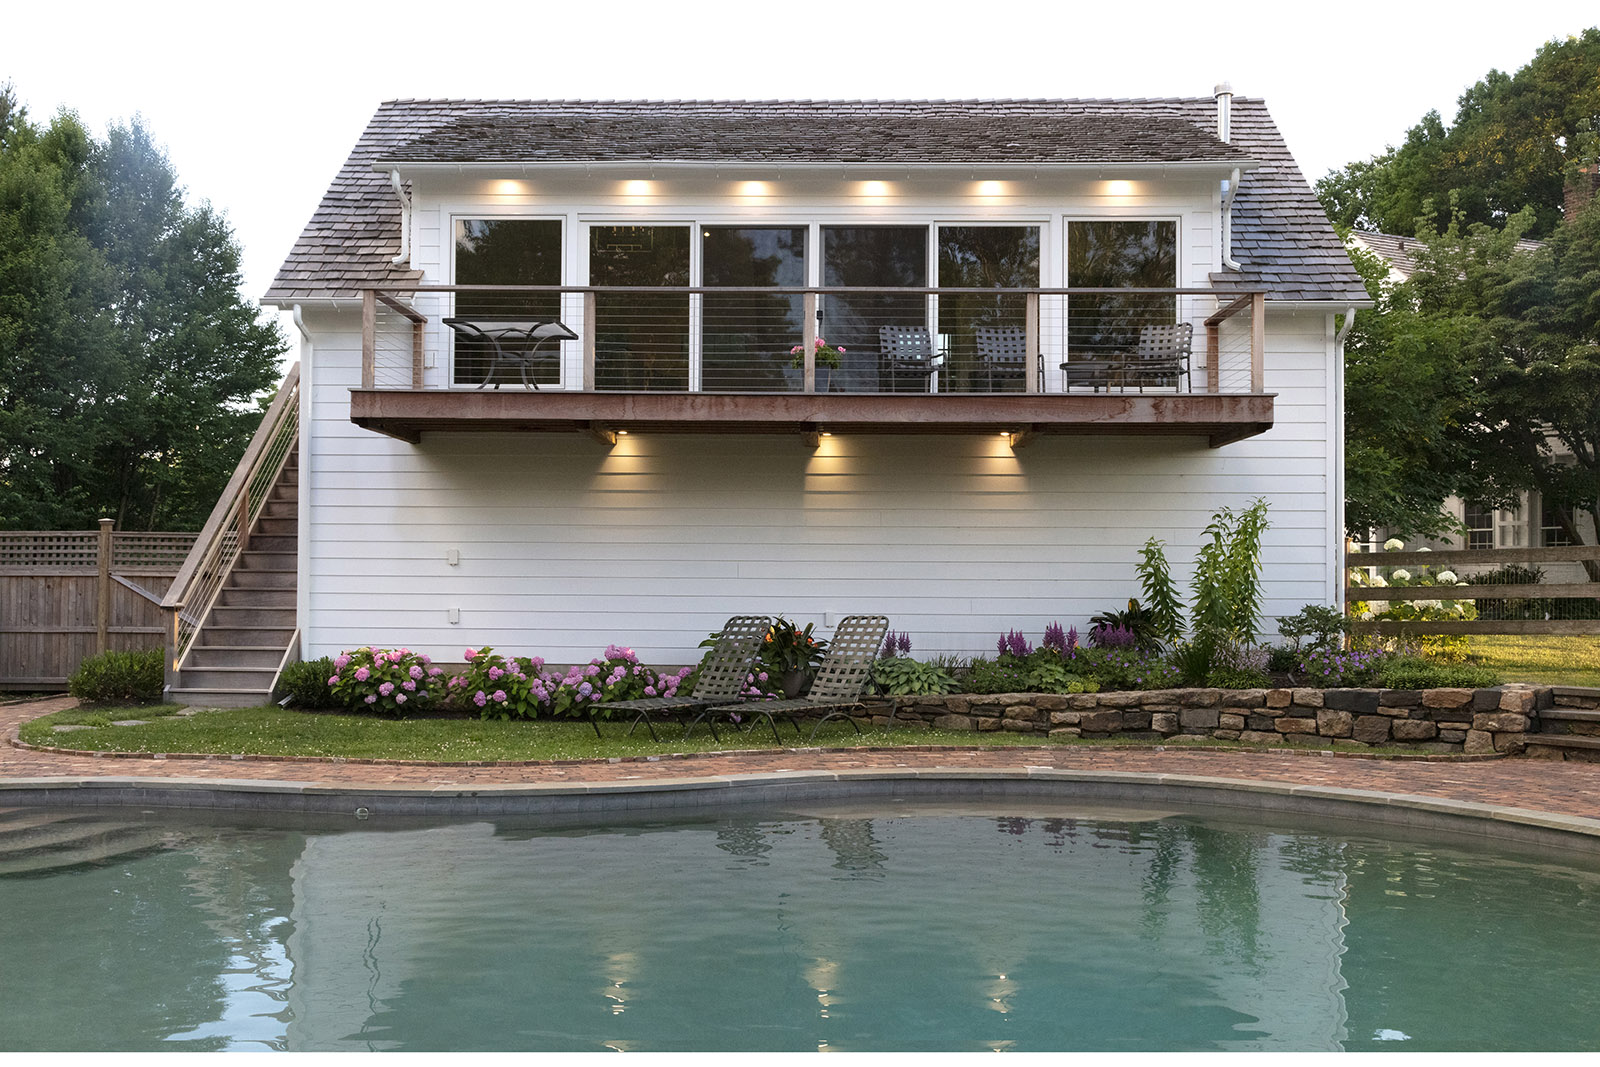
Rear View
- Full glass wall facing the pool and golf course
- Cable railing was selected to maximize the view with minimum obstructions.
- IPE deck at balcony with IPE skirt board( hidden fasteners and screwed with plugs).
- Direct access from pool to pool house.
- Lights in soffit to lighten up the balcony at night.
- No windows were designed below so people can’t see into the garage.
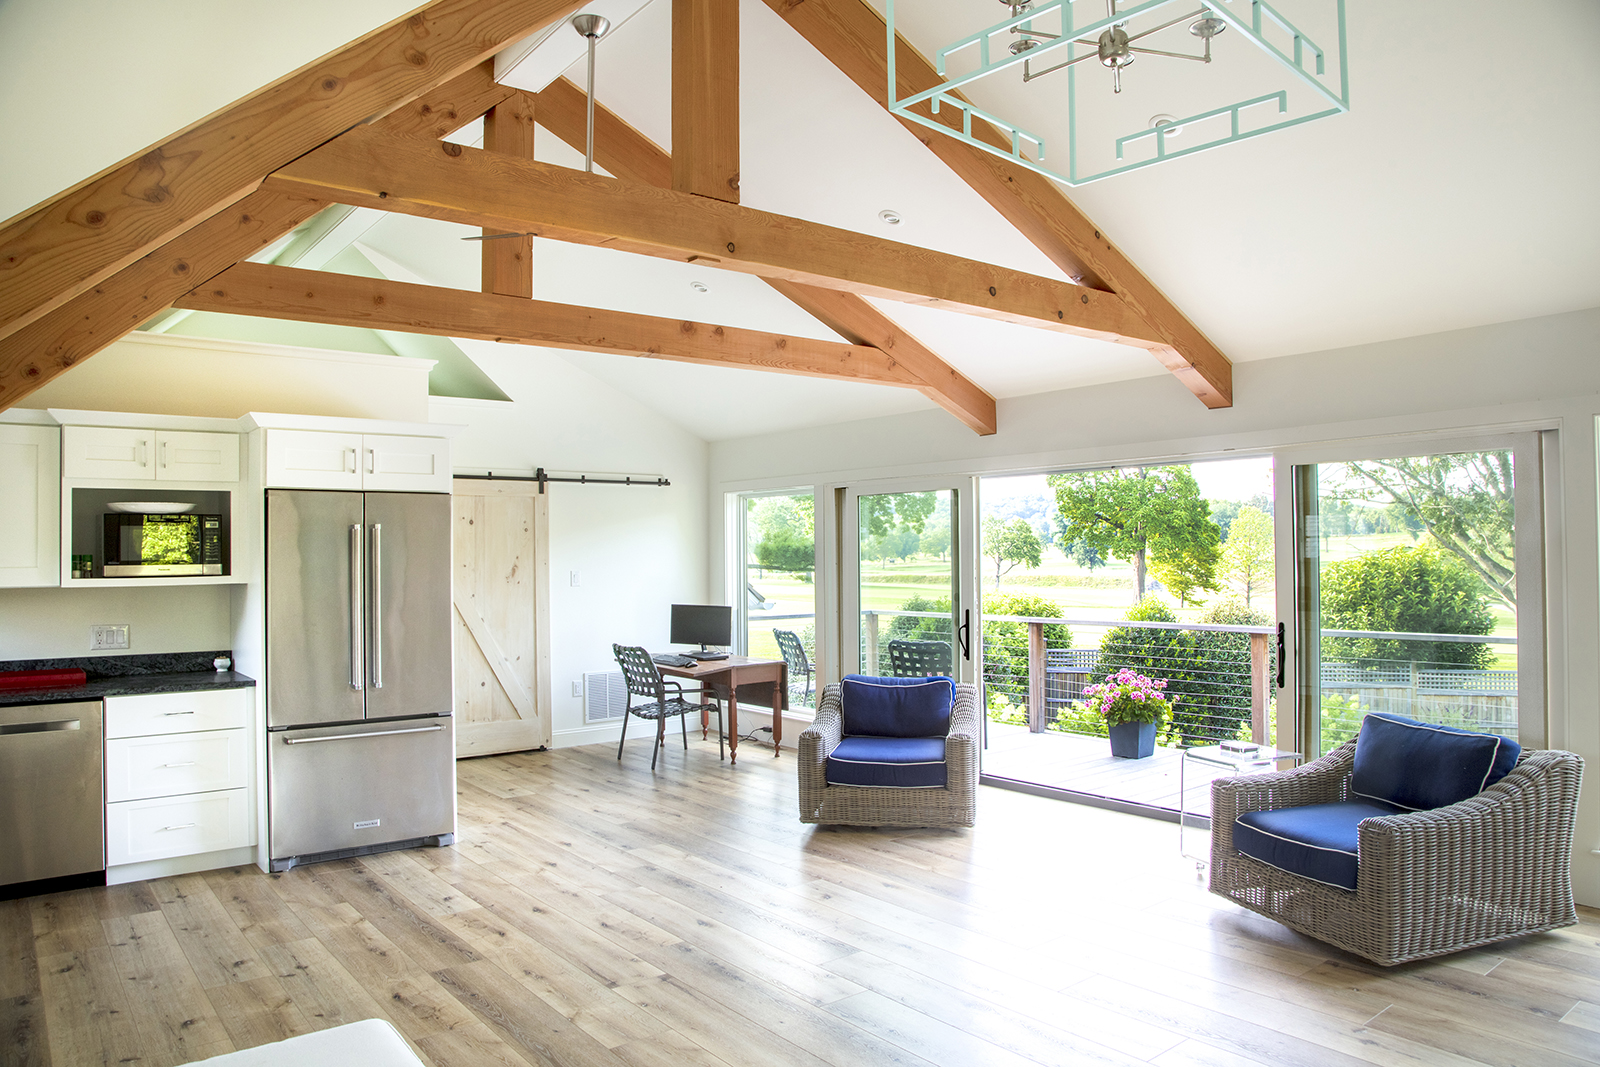
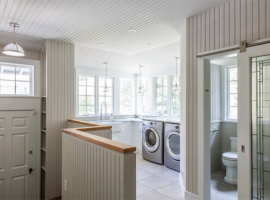
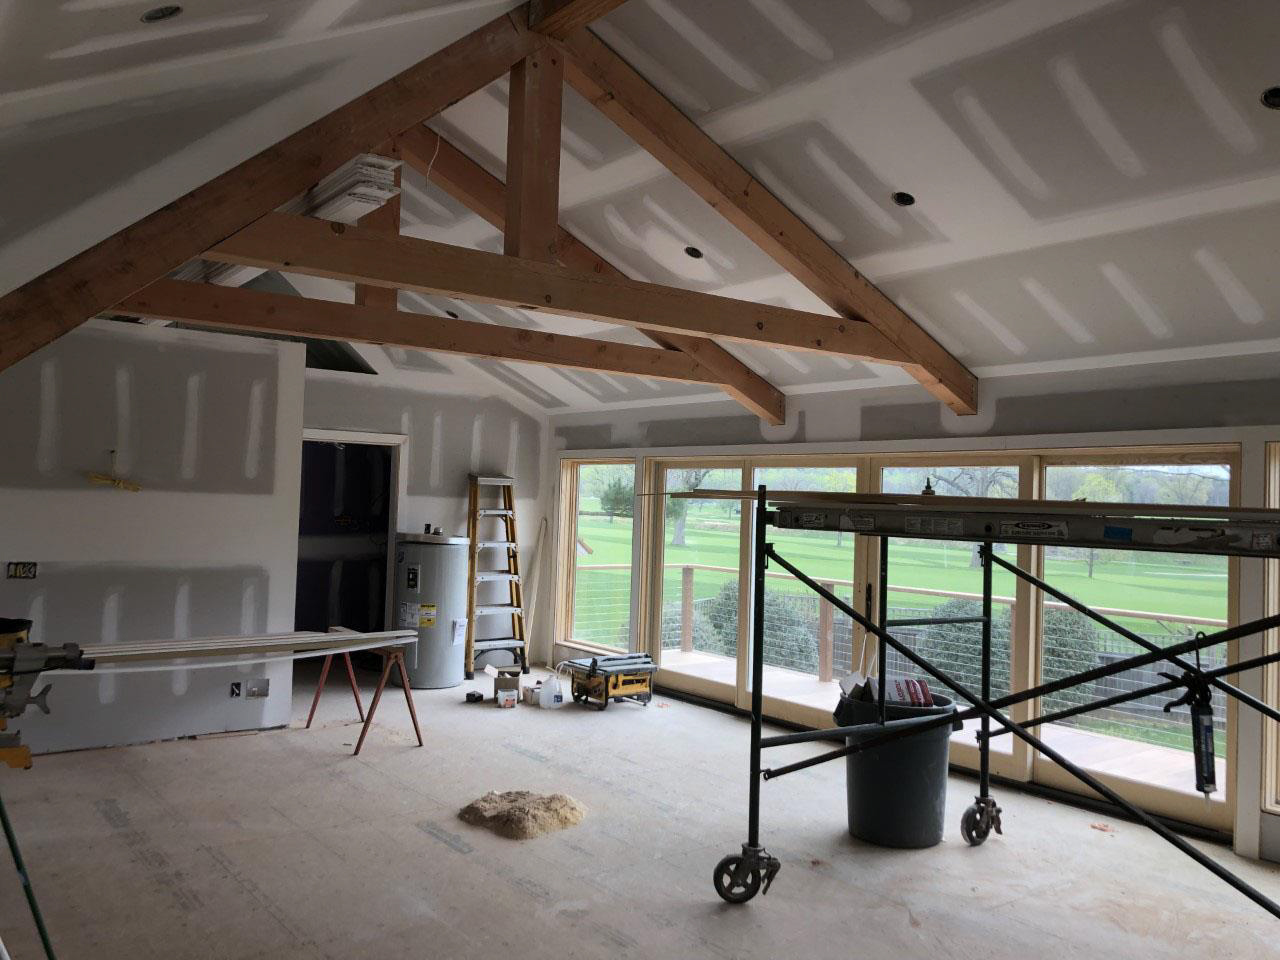
Interior view
- Timber trussed stained and made to look structural.
- Glass wall at the rear to maximize views.
- Kitchenette tucked into the corner for entertaining.
- Open floor plan for maximizing space and occupants.
- Storage closet for pool storage alongside wall.
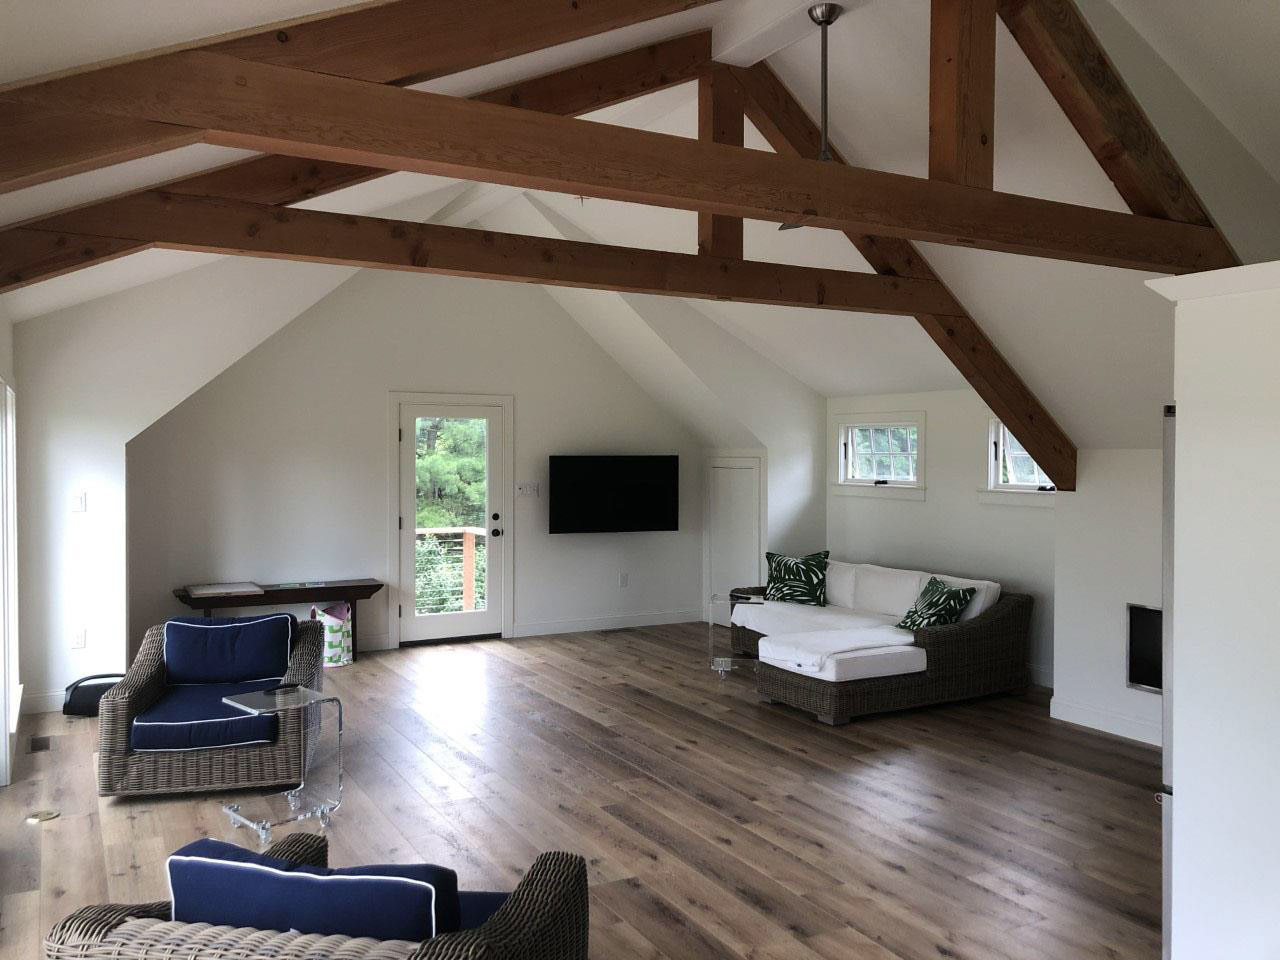
Interior view
- Gas fireplace was added into one of the eave walls to provide a more cozy space.
- Entry door to the pool.
- Flexible floor space for different uses.
- Hidden closets were tucked into the knee walls to maximize storage. Shelves were installed for organization.
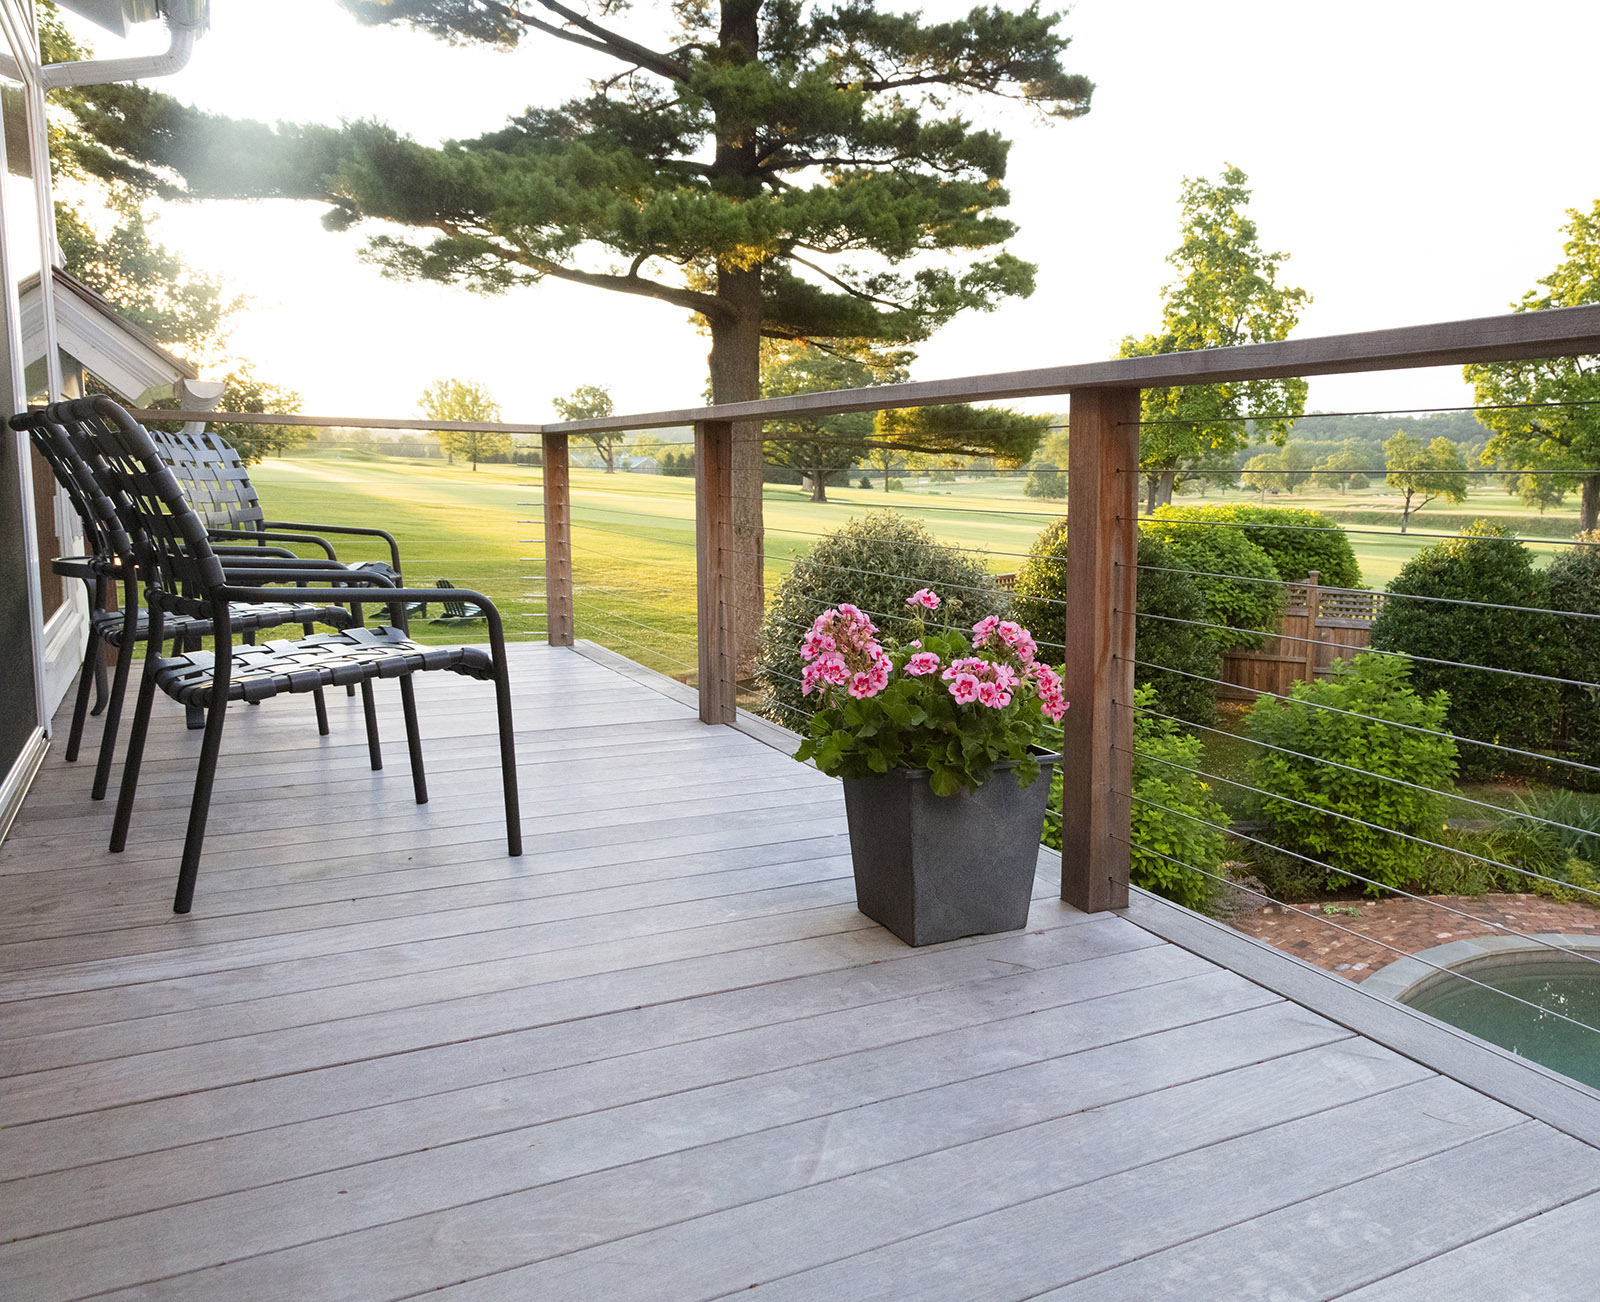
Rear Balcony
- IPE decking with perimeter edging.
- Cable rail system.
- IPE posts and cap to minimize obstructions and maximize the view.
Final Product
The client was more than ecstatic with the end result. The new Pool house made use of the existing foundation and looked as if it was always there. The second floor blends with the exterior surroundings, making the occupant feel as if they are outside while relaxing in the pool house. The views from the balcony are spectacular and allow swimmers to be observed at the same time. When it was completed, the owner’s daughter had a sleep over inside the pool house with 14 friends. They said it performed perfectly and the kids had a great time in the new space